
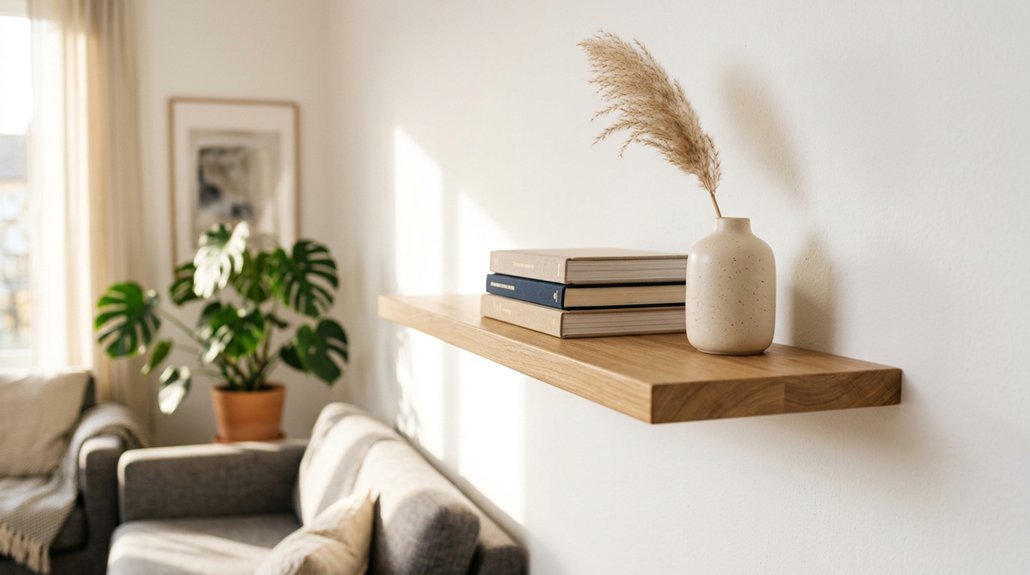


You see a shelf clinging to your wall, no brackets in sight, and you wonder what’s holding it up. The secret is a hidden channel inside the shelf, metal rods anchored deep into studs, and set screws that lock everything tight. Your wall takes the weight, the wood hides the hardware, and you get that clean, floating look.
But here’s the catch: miss a stud, skip the level, or overload the front edge, and that sleek shelf tilts toward the floor. You need to know what your wall can handle before you drill a single hole.
What Makes Floating Shelves “Float”
How exactly does a floating shelf seem to hover against your wall? You’re seeing concealed brackets at work. These floating brackets install directly into wall studs or solid blocking, not drywall alone, which determines your load capacity. If you’re planning heavy items, anchor into studs every time.
The magic happens inside a back channel, a hollow groove running along the shelf’s rear edge. You’ll slide the shelf onto rods protruding from the wall, then tighten set screws underneath. The hidden hardware disappears completely; the wood exterior masks everything.
Your shelf mounting method dictates stability: more brackets mean better weight distribution. For typical 8–12 inch depths and 1.5–3 inch thicknesses, this system handles everyday loads gracefully. You’re essentially creating a cantilever, where the wall bears the torque and the shelf appears weightless.
Recommended Products

Superior Quality: Our floating shelf bracket is expertly crafted from premium steel, ensuring exceptional durability and an impressive weight capacity of 110lbs.
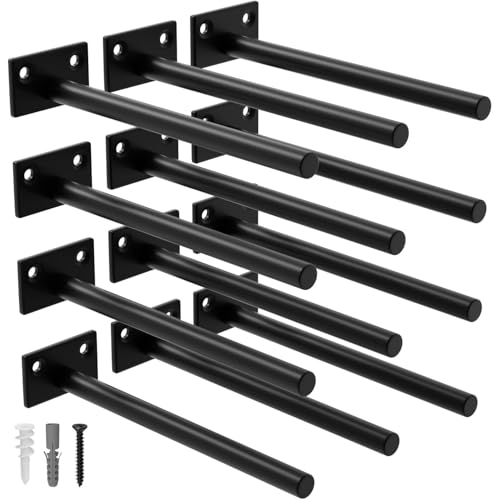
Superior Quality: Our floating shelf bracket is expertly crafted from premium steel, ensuring exceptional durability and an impressive weight capacity of 110lbs

The bracket has a 1" backplate and is designed for use with boards 1.5" thick or more.NOTE: The board thickness we refer to is the actual (not nominal) size.
How the Hidden Bracket System Works
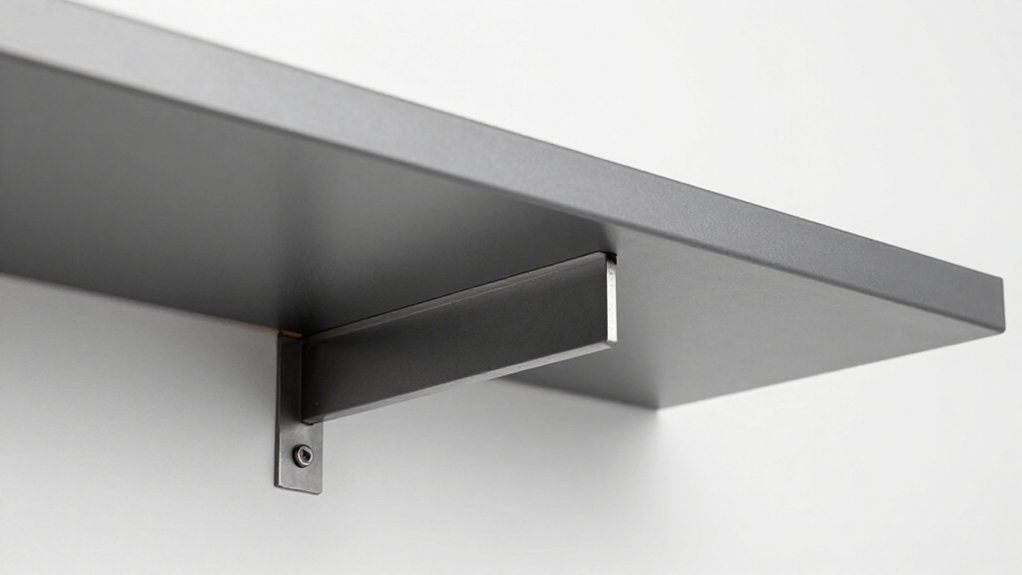
The concealed bracket is where the real engineering sits, and understanding it helps you install with confidence.
A floating shelf uses a hidden bracket, a steel frame that lives inside a routed back channel. You mount the bracket to wall studs, never drywall alone, because that’s where load transfer happens. The bracket’s back bar attaches to the wall, and outward rods protrude; the shelf slides over these rods and locks tight.
Once installed, concealed hardware disappears completely. The wood covers everything, creating that clean, floating look you want.
For front-edge stability, anchor properly into studs, shim when needed, and add more rods if you’re storing heavy items. Check levelness before final placement.
Done right, this system hides the mechanics while handling serious weight.
Recommended Products

The bracket has a 1" backplate and is designed for use with boards 1.5" thick or more.NOTE: The board thickness we refer to is the actual (not nominal) size.

✓ HIGH-QUALITY METAL MATERIALS: Our shelf support is made of thick and heavy duty iron materials.Features a thick black matte surface coating that delivers enhanced water resistance and effective anti‑rust performance for long‑term daily use.

Heavy Duty design, maxium support weight of 100lb for a pair of this L bracket. Matte black powder coat finish. Creating a rustic, reclaimed, salvaged look,perfect for your home, office, garage, work space or anywhere else
Hollow Core vs. Solid Hardwood Floating Shelves
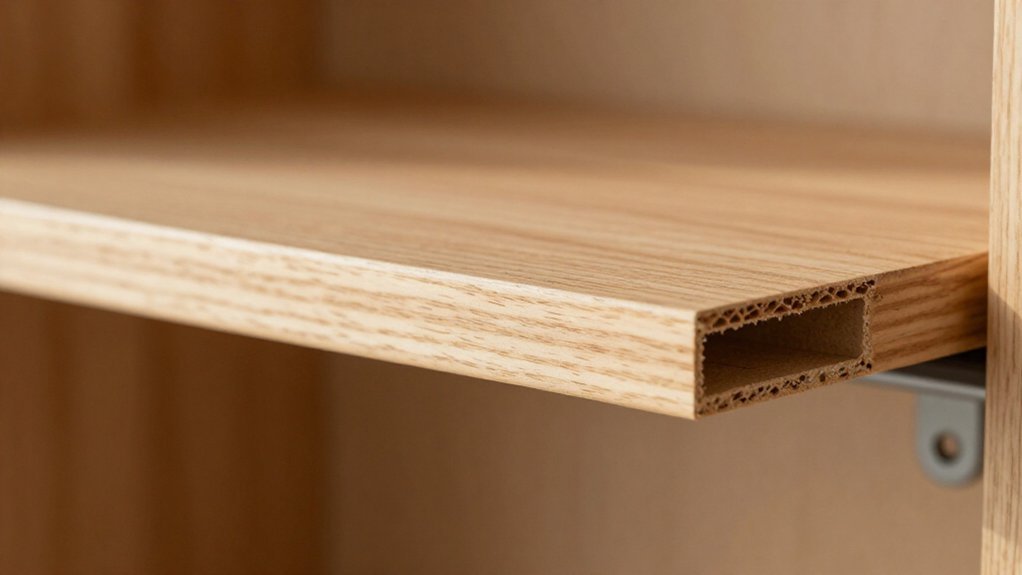
Why does shelf construction matter so much? Your choice between hollow-core shelves and solid hardwood directly determines how much weight you can safely display, and for how long.
Consider these differences before you buy:
- Hollow-core shelves use thin MDF or particleboard with interior cardboard, so they’re light and cheap but prone to sagging and moisture damage
- Solid hardwood offers genuine sag resistance because real wood maintains stiffness, keeping your shelf depth true over years of use
- Concealed brackets in hollow-core systems need routed back channels and solid gripping points, while solid hardwood transfers loads directly into studs through hardware
- Weight capacity varies sharply: hollow-core units top out around 15-20 pounds, but properly installed solid hardwood with stud mounting handles 50+ pounds
Match your shelf depth and thickness to your bracket system. Thicker solid hardwood reduces flex and maximizes capacity.
Recommended Products

Heavy duty design - Our shelves will hold as much as 120 lbs when mounted to a stud or brickwall because our brackets are made of solid steel and welded components and includes quality screws and anchors.Designed to support 6.5 inches to 8 inches deep shelf.

Firm & Solid Construction: Our wall-mounted shelf is 430 stainless steel, ensuring durability and easier cleaning. The surface features a brushed treatment, built to resist daily scratches, corrosion, and tarnishing. So don't worry about food and liquid splashes ruining your surface

Premium Stainless Steel Floating Shelf : Made of high-quality stainless steel, this floating wall shelf is rust-resistant, moisture-proof and easy to clean. Perfect for humid areas such as bathrooms and kitchens while maintaining a clean, modern look
How to Choose the Right Shelf Size for Your Wall
Before you buy, you’ll measure your wall space, account for stud locations (typically 16 inches apart), and select a shelf depth that matches your storage needs without overhanging traffic paths. Standard depths run 8 to 12 inches, with 10 inches suiting most books and display items, while deeper shelves demand stronger brackets with more support rods.
You’re also checking that your chosen span, usually 24 to 48 inches, aligns with at least two wall studs or solid blocking for secure anchoring.
Recommended Products

2 Set Wall Jewelry Organizer: With sizes of 13.4 x 4 inches. Made of premium transparent acrylic, this compact and functional jewelry storage would be a nice addition to your home decor.

MEMORIES SHOWCASE SHELF: Do you have a lot of memorable photos, but don't know how to display them, Fun Memories picture ledge shelves (especially in large sizes) are perfect for you to display them! With our hanging racks, you can store and display different types and sizes of photo frames in one place without worrying about

Quality Material: Made from durable MDF with a realistic wood grain finish, the floating shelves offer a sturdy structure, smooth appearance, and resistance to warping
Measuring Your Wall Space
Where exactly will your shelf live, and what do you plan to put on it? Your wall space measurement determines everything else, so grab a tape measure and locate your wall studs first. You’ll need this data to match your bracket system to real support.
Measure the horizontal span where you’ll install, noting any outlets or obstacles. Check stud spacing, typically 16 inches apart, to plan rod placement for your hidden brackets. Verify your mounting depth won’t block doors, traffic paths, or adjacent fixtures.
Confirm blocking behind wall exists, or plan to add it, before trusting any load capacity claims.
A thicker shelf, 1.5 to 3 inches, accommodates the concealed steel bracket while adding strength. More rods into solid backing means heavier items; deeper shelves need more support points. Map it once, mount it right.
Matching Shelf Depth
Once you’ve mapped your wall space and confirmed your studs or blocking, you’re ready to match the shelf itself to the job it’ll do. Shelf depth directly affects load distribution, so you’ll want to choose carefully.
General Guidelines
- Standard depth: 10 inches works for most items (books, frames, small plants).
- Range: 8–12 inches fits most homes, depending on what you’ll store.
- Corners/tight spots: 8 inches reduces crowding without sacrificing display space.
Going Deeper
Beyond 12 inches, you’ll need thicker shelves and heavier-duty brackets. The mounting depth must match your bracket system exactly.
Deeper shelves push weight farther from wall studs, increasing leverage, so your hardware and blocking must handle the stress. Prioritize sag prevention by pairing shelf depth to bracket capacity. Don’t guess; check specs before you buy.
Spanning Stud Placement
How do you pick a shelf that won’t sag or rip out of the wall? You match span length to your stud layout, simple as that. Standard stud spacing runs 16 inches on center (sometimes 24), so measure your wall studs before buying anything.
Locate wall studs with a stud finder, marking each center point clearly. Choose mounting brackets that reach two or more studs for real strength. Check bracket alignment so every hole lands on solid wood, not empty drywall.
Install blocking between studs if your span length demands extra support. Deeper shelves need heavier hardware, but placement matters more. Without blocking behind the wall, you’re trusting thin drywall, and that’s a gamble. Nail the stud layout first; everything else follows.
Weight Limits: How Much Your Shelf Can Hold
You need to know your bracket’s load rating before you buy, since that’s the hard ceiling on what you can safely store. Mounting into studs or solid blocking, never drywall alone, determines whether you’ll hit that ceiling or crash through it.
Check your wall first, match that reality to your bracket specs, and you’ll avoid a mid-afternoon crash.
Recommended Products

Solid Walnut Wood Floating Shelves: Expertly crafted from premium solid walnut, each wall shelf features a unique wood grain and softly rounded edges that bring modern rustic elegance and organic warmth to any room in your home

Solid Wood Floating Shelves: The 60 inch wood Floating Shelf is made from 100% solid pine, selected for its beautiful wood grain texture and knotted into points, with a sanded, hand-stained finish that gives the space a rustic, natural, warm feel. Note: All steps are done by hand and each ledge is slightly different, but equally stunning!

[End the Sagging Stress] Stop worrying about shelves that tilt or "dip" over time. While others struggle with weight, our 1.4" extra-thick solid elm is paired with industrial-strength steel brackets featuring 360° reinforced welds. Experience rock-solid stability (up to 50 lbs) that keeps your books, heavy jars, and kitchen essentials perfectly level.
Bracket Load Ratings
Exactly how much can your floating shelf handle before it gives way? Your floating shelves load capacity hinges on bracket load ratings, which manufacturers set based on real-world testing. You can’t ignore these numbers; they’re your safety margin.
Big-box hollow-core shelves top out near 20 lbs, barely enough for small decor. Three-rod systems with multiple rods support hit roughly 240 lbs, a massive jump in strength.
Shelf depth ratio directly impacts stress; deeper shelves need stronger brackets and more rods. Drywall limitations mean stud anchorage or wall mounting blocking is non-negotiable for meaningful loads.
You get what you install for. Skip proper anchorage, and you’ll face collapse. Nail the hardware selection, and your shelf performs as rated, period.
Stud Mounting Matters
Where does your floating shelf’s real strength come from? It comes from stud mounting, not drywall anchors.
Your weight capacity jumps dramatically when you drill into studs or blocking. Low-end shelves hold 20–25 pounds on weak wall mounting, but quality brackets with multiple rods reach hundreds of pounds. Three-rod HD configurations carry roughly 240 pounds, proving capacity scales with rod count and shelf length.
For meaningful loads, always install into two or more studs. Drywall-only setups fail under pressure.
Deeper shelves demand stronger brackets and extra rods for even load distribution. Without this, cantilever leverage wins, and your shelf sags. Hollow-core MDF front edges dip easily, so add shims behind brackets and check rod depth.
Match your brackets to your load, your studs to your plan, and your blocking to your ambition.
Why Floating Shelves Fall (and How to Prevent It)
How do floating shelves fail when they look so seamless on the wall? You miss the studs, overload the hidden brackets, or skip wall blocking, and gravity wins. Your mounting decisions directly control load distribution, so you can’t guess where support lives.
Gravity wins when you miss the studs, overload hidden brackets, or skip wall blocking—mounting decisions control everything.
Common failure points include:
- Missing studs or solid blocking, forcing drywall to bear all weight
- Exceeding weight capacity with heavy collections or dense items
- Choosing hollow-core shelves that start sagging within months
- Poor load distribution, concentrating mass on one bracket
You prevent collapse by anchoring hidden brackets into multiple studs, adding wall blocking where studs don’t align, selecting solid hardwood to resist sagging, and respecting published weight capacity. Check your brackets, verify your mounting points, and distribute weight evenly across the shelf length.
Recommended Products

Superior Quality: Our floating shelf bracket is expertly crafted from premium steel, ensuring exceptional durability and an impressive weight capacity of 110lbs

Superior Quality: Our floating shelf bracket is expertly crafted from premium steel, ensuring exceptional durability and an impressive weight capacity of 110lbs.

【Dimensions】16inch bracket with 6inch rods, designed to support 6.25 inches to10 inches deep shelf. Lumber thickness1.2-4 inches, length is from 16 inch to 21 inch . (lumber board is NOT included)
Is Your Wall Right for Floating Shelves?
Is Your Wall Right for Floating Shelves?
Before you commit to a floating shelf, you need to know what your wall can actually handle. Wall compatibility starts with locating your wall studs, because drywall alone won’t manage the weight transfer. You need solid blocking or at least two wall studs for safe installation.
Check your mounting depth against the concealed bracket; most shelves run 8–12 inches deep with 1.8-inch thickness to hide the bracket channel. If you’re hitting three studs or blocking, a three-rod system handles about 240 pounds. Uneven walls cause sagging front edges, so shim behind the bracket to true the shelf.
Skip the studs or blocking, and you’re risking failure regardless of the shelf quality. Verify your wall setup first, then buy accordingly.
How to Install Floating Shelves So They Stay Put
Why do floating shelves fail? They fail when you skip the installation guide and trust drywall alone. You need to anchor into wall studs, or solid blocking, so weight transfers properly.
Locate wall studs with a stud finder, then mark drill points precisely. Slide the hidden bracket into the back channel until it locks flush. Check level alignment with a four-foot level, shimming if the front edge dips. Test weight distribution by placing heavier items directly over stud lines.
Your load capacity depends on bracket rod count and shelf length. Typical setups handle 50 to 100 pounds when anchored right. Thicker shelves, correct bracket depth, and spreading weight across multiple rods prevent sag. Do this once, and your shelves stay put.
Recommended Products

HEAVY DUTY FLOATING SHELF BRACKET - This solid steel wall mount system contains one bracket that is 12 inches long. We recommend using this bracket for shelves 12 inches to 18 inches long, allowing you to hang shelves within that range without compromising the decorative theme or aesthetics of your home decor.

✅EASY EXPANSION: The tv floating shelves wall mounted AV rack’s interlocking brackets make it easy to join multiple units together, giving you the freedom to add as many as needed to carry your devices.

Wall-mountable floating shelf easily installs without needing a single tool—just place, push, slide, and hang.
When Prefinished Floating Shelves Beat Building Your Own
What if you could skip the sawdust, the stain fumes, and the weekend lost to sanding? You can, with a prefinished floating shelf.
Here’s when buying beats building:
The hidden bracket comes factory-installed, so you skip measuring, drilling, and praying your bracket lines up.
You mount the bracket into studs or blocking, just like DIY, but you cut hours off the job. No on-site finishing means no waiting for coats to dry.
You get solid hardwood, not hollow-core MDF that sags under weight.
Factory finishes deliver consistent color and sheen, plus built-in moisture resistance for kitchens and baths.
Touch-ups use manufacturer-approved products, so you avoid full refinishing later.
Installation stays simple, you gain durability, and you reclaim your weekend.
Recommended Products

2 Set Wall Jewelry Holder: With sizes of 13.4 x 3.5 inches. Made of premium transparent acrylic, this space-saving jewelry storage makes it easy for you to categorize and store your valuables.

REVERSIBLE BRACKETS, TWO LOOKS IN ONE — Most floating shelves lock you into one aesthetic. These don't. The solid steel triangular brackets mount above or below the board — bracket-up for a bold industrial statement, bracket-down for a cleaner, more minimal look. Either way, you get 35 lbs of load capacity per shelf, distributed evenly across the board. Built for books, plants, kitchen essentials, and anything else you'd trust to a wall.

High Quality: Sized in 23.6"L x 7.9"W x 1.5"H. The 1.5" thick floating shelves for wall are fixed with Invisible and enhanced dual-pipe iron Brackets, stable with great load up to 22 lb per wall mounted shelf