
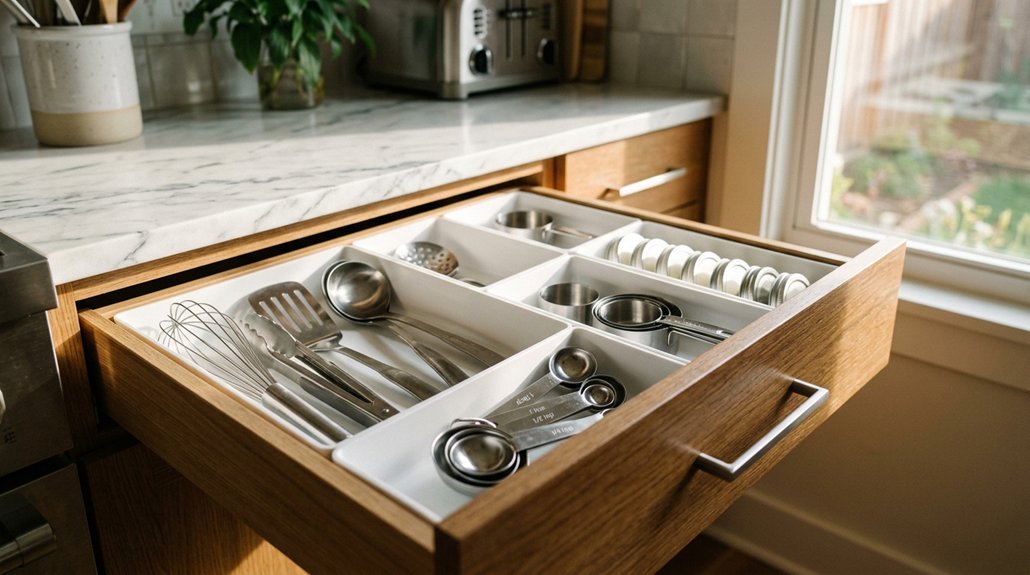


You pull open your kitchen drawer and face a jumble of spatulas, takeout menus, and gadgets you forgot you owned.
In 30 minutes, you can change this chaos into a system that actually works.
Start with one drawer, sort everything into keep, toss, or relocate piles, and clean the empty space.
Map zones for cooking, serving, and storage; place daily essentials front and center.
Add sturdy bamboo dividers that stay put, handle tricky items like knives with blade guards, and commit to one-in-one-out rules.
The real question isn’t whether you can organize seven drawers.
It’s which drawer you’ll tackle first, and what you’ll discover when you do.
Start Small: Transform One Kitchen Drawer in 30 Minutes
Why overwhelm yourself with the whole kitchen when one drawer can change how you cook? Drawer organization starts with one space, 30 minutes, and a clear plan.
First, pull everything out. You need a blank canvas to see what you’re working with. Now declutter ruthlessly: if you haven’t touched it in months, it doesn’t belong here. Keep only tools you reach for weekly for quick access.
Next, sort survivors into categories: utensils, measuring tools, gadgets. Grouping like items prevents the jumble from returning.
Then install dividers, bamboo or heavy wood, sized to your drawer’s exact width. These create firm compartments that won’t shift when you slam the drawer shut.
Finally, reassemble with purpose. Place most-used items at the front. Add brief labels to each section, creating labeled zones you’ll maintain without thinking.
Recommended Products

4 Drawer Dividers with 9 Inserts: Customize your drawer with our bamboo dividers and inserts; You can organize everything from silverware to utensils. The mini dividers can be easily inserted to make smaller or larger storage parts; LENGTH SIZE: Expandable from 17" to 22" Long

Perfect Drawer Organizer: This is a simple and easy way to organize kitchen utensils or clothes; Keep everything neat, organized and access convenience
Sort Everything Into Keep, Toss, and Relocate Piles
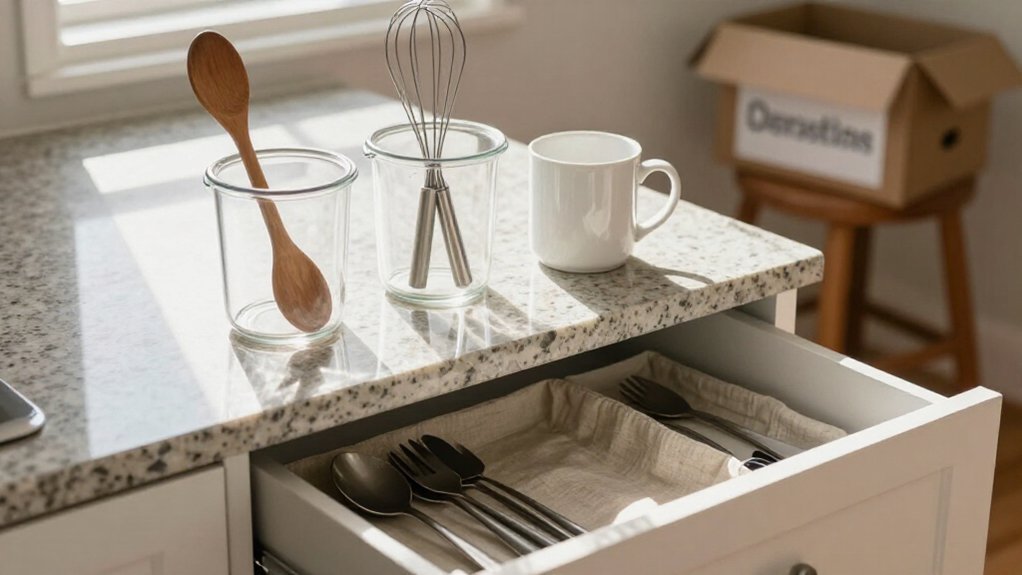
Where do you start when one drawer holds five years of random accumulation? You pull everything out, every last item, and create a blank canvas for assessment. This is the only way you see the true scope of clutter and overstock hiding in your kitchen drawers.
Now you sort. Create three distinct piles: keep, toss, relocate. The Keep pile gets items you use regularly, ones that fit your designated space. The Toss pile collects unusable, damaged, or expired items. The Relocate pile holds things better suited elsewhere.
For effective decluttering, review each group with utensil categorization in mind. Ask yourself: When did you last use this? Does it belong here? Be honest, be ruthless.
This organization step shapes your final drawer layout. Clear containers and labels enhance visibility. You reassemble with daily essentials in easy-reach spots, seasonal items reserved for back zones.
Recommended Products

Drawer dividers are the perfect solution to organize open drawers to keep things from shifting.

Premium Natural Bamboo: Crafted from solid bamboo with a smooth polished surface; sturdy for daily use; natural finish complements most cabinet and drawer interiors in kitchen bedroom or office

【Measure Drawer Size】Please measure your drawer before purchasing! This set of bamboo drawer dividers is designed for drawers with an internal height of less than 2.36 inches and a length of 17.5 to 21 inches. If your drawer's internal height is less than 2.36 inches and its length is either less than 17.5 inches or exceeds 21 inches, it will not work
Clean and Map Zones for Cooking, Serving, and Storage
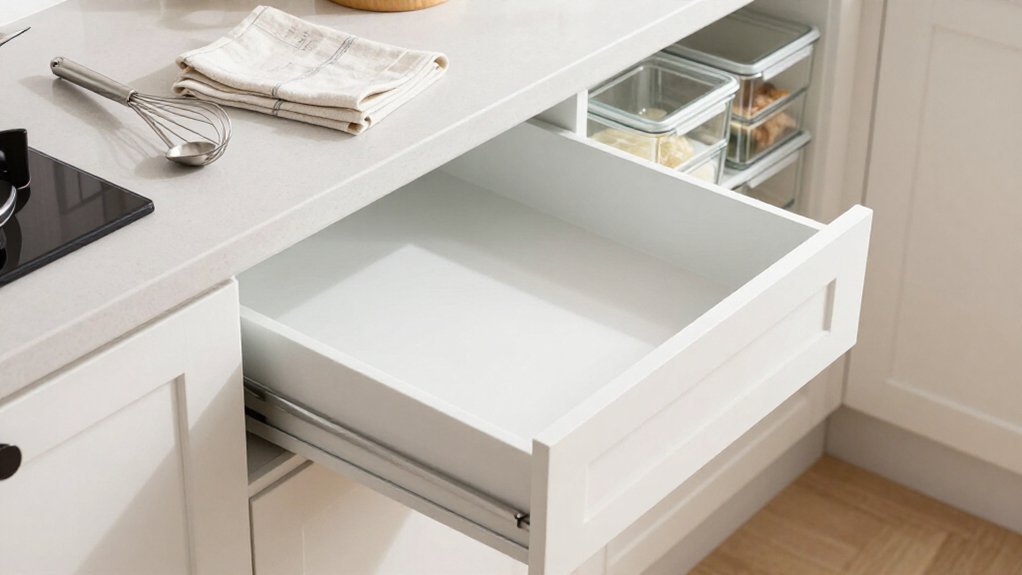
You’ll start by assigning each drawer a clear purpose, cooking utensils near the stove, servingware close to the dining area, and storage items by the pantry. Map every category to its designated zone, keeping your most-used tools within arm’s reach of prep spaces and relocating rarely used pieces to secondary drawers.
Once you’ve mapped your stations, you’re ready to install dividers or shallow bins, maximizing vertical space and ensuring every item has an accessible, logical home.
Recommended Products

Safe, organized storage for up to 9 knives. Non-slip feet.

DRAWER KNIFE SMALL ORGANIZER: Keeps your kitchen knives sharp, safe, and organized with less effort
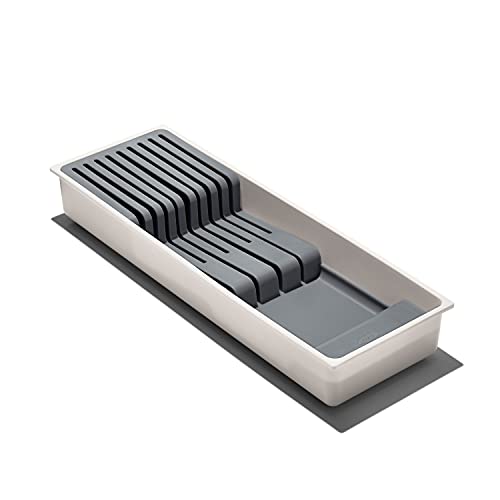
Safely and neatly store knives in drawers to save countertop space
Zone Your Kitchen
Because a disorganized kitchen wastes your time and energy, start by pulling everything out of your drawers and cabinets so you can see exactly what you own.
Now create zones: cooking, serving, and storage. You’ll map cabinet space for baking, everyday dishes, cleaning supplies, and utensils. Place frequently used items in the cooking zone within easy reach. Reserve the serving zone for trays, platters, and bulk-serveware.
Maximize accessibility with vertical organization and door-mounted hooks for small tools. Consolidate like items, pots with pans, utensils together, spices grouped, to minimize movement during meal prep. Labeling containers and designating clear spaces maintains your organization long-term.
- Assign dedicated cabinet space for each zone
- Position everyday items closest to your cooking surface
- Install door-mounted racks for vertical storage gains
- Apply labeling to every container and shelf edge
Map Drawer Functions
How do your drawers currently serve you? Map their functions by creating distinct zones: cooking tools in one area, servingware in another, and storage items in a third. This organization streamlines your daily workflows.
Evaluate each drawer’s contents, purge unused items, and relocate frequently used tools to sections with maximum accessibility. Install adjustable dividers to build functional subzones within each drawer. Add clear containers to keep similar items visible and together.
Use vertical organization and door-mounted hooks or racks to maximize space without sacrificing accessibility.
Document a simple mapping chart for each drawer. This guides future reorganizing and maintains consistent zones over time.
Your kitchen drawers should work for you, not against you. Clean, map, and divide them into purposeful zones today.
Assign Cooking Stations
Now that you’ve mapped your drawer’s general functions, it’s time to get specific. You’ll create dedicated zones that match your daily workflow: a cooking drawer near your stove for utensils you grab constantly, a serving zone for plates and flatware, and storage areas for spices and measuring tools. This organization cuts movement and saves minutes every meal.
- Designate one cooking drawer for spatulas, spoons, and tongs within arm’s reach of your prep space
- Map zones by frequency: daily tools go in easy-access drawers, rarely used items move higher or farther away
- Install partitioned organizers, like bamboo dividers or two-tier pull-outs, to keep each zone visible and sorted
- Consolidate by function; all prep utensils together, all cookware accessories separate, to eliminate rummaging
Reassess monthly. Shift items based on actual use patterns.
Arrange Items by Frequency: Most-Used Front and Center
Where should you reach first when you open a kitchen drawer? You’ll want your most-used items front and center, period. This frequency-based organization cuts search time and unnecessary motion every time you cook.
Your most-used items belong front and center—frequency-based organization eliminates wasted motion every time you cook.
Start by grouping your daily essentials, spoons, spatulas, tongs, into clear drawer zones. You’re creating visual order, not just tidy piles. Install adjustable dividers or expandable bamboo organizers to keep high-use tools visibly separated from rarely used items. These maintain structure without guesswork.
Position your can opener, measuring spoons, and peelers in the most reachable sections. Move lesser-used gadgets toward the back.
Reassess every three to four weeks, rotating tools as your cooking habits shift. Remove items you haven’t touched. Your drawers should reflect actual routines, not aspirational ones.
Recommended Products

【Make Everything Organized】This 4pack clear drawer organizer set (15" x 6" x 2" each) neatly stores spatulas, ladles, whisks, knives, forks, and more. Maximize Kitchen drawer space and keep everything tidy and easy to find.

ORGANIZE: Allow drawer organizer bins to declutter countertops & maximize drawer storage

ORGANIZE: Allow drawer organizer bins to declutter countertops & maximize drawer storage
Add Organizers That Stay Put in Kitchen Drawers
You’ll want organizers that don’t slide around every time you open the drawer, so pick heavier materials like solid wood or bamboo over flimsy plastic. Expandable bamboo dividers let you customize compartment widths, fitting narrow slots for measuring spoons and wider spaces for spatulas.
Match the organizer’s weight and grip to your drawer’s surface. Heavier pieces stay put on smooth liners, while rubber-bottomed options work better on unfinished wood.
Recommended Products

Expandable Design for Flexible Fit: This Lifewit silverware organizer adjusts from 8" to 13.8" wide, making it ideal for small to standard drawers. Perfect for everyday forks, spoons, and knives—not designed for oversized utensils. Please measure your drawer before purchase.
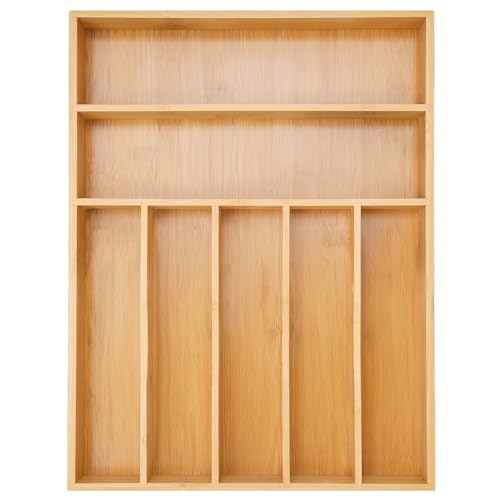
【Keep Your Home Tidy】This beautiful 7-compartments cutlery organizer has 2" deep compartments and can be placed into any drawer or desktop, which helps you to see everything at a glance and keep away from messy. The perfect space-saving silverware organizer helps you to reach the desired item that you are looking for. Whether you are looking for your favorite knife or spoon, this utensil organizer makes it completely simple and easy. We highly recommend to measure your drawer before order.

Elegant Design: including two 3-compartment , keeps your makeup organized and within easy reach; perfect choice for adding storage space on bathroom countertop, vanity and so on
Choose Weight Over Expandability
Lightweight organizers might seem convenient at first, but they slide around every time you open the drawer. You need weight-bearing drawer dividers that anchor your kitchen drawers with real stability.
Choose fixed organizers over flimsy alternatives. Heavy wood or bamboo dividers resist shifting, while non-slip bases grip drawer bottoms without adhesive. You will appreciate how 14-slot and 7-slot knife blocks, and built-in dividers, maintain alignment through daily use.
Select compact, sturdy options that handle spoons, spatulas, and tongs without buckling. Match organizer dimensions precisely to your drawer size, avoiding overstuffed setups that compromise function.
- Pick heavy wood or bamboo dividers that resist shifting.
- Install fixed organizers with precise dimensions for your drawers.
- Select non-slip, weight-bearing materials for daily durability.
- Balance weight and capacity without overcrowding.
Anchor With Expandable Dividers
An expandable bamboo drawer organizer gives you the flexibility to fill odd-width drawers without leaving gaps where spatulas slide and disappear. You anchor dividers by selecting heavy wood or rigid materials that resist shifting, creating fixed, non-shifting sections that adapt to your space.
Pair 14-slot and 7-slot in-drawer knife storage with bamboo inserts to keep blades unmoved and aligned, reducing countertop clutter. You gain better stability when you relocate heavy, frequently-used utensils from thinner plastic drawer organizers to sturdier square/rectangular dividers.
Mix expandable dividers with customized layouts for flexible organization. Continuously assess whether your expandable dividers stay put under daily use, adjusting as needed to maintain visibility and separation.
Choose materials that grip drawer bottoms, ensuring your system remains functional over time.
Match Material to Drawers
How do you keep your organizers from drifting every time you close a drawer? You match material to drawers with purpose, choosing in-drawer organizers that stay put without fuss or adhesive.
- Select modular bamboo dividers for flexible, sturdy compartments that grip drawer bases naturally.
- Install expandable drawer organizers, trimming them to exact drawer dimensions for a tension fit that resists shifting.
- Prioritize non-shifting materials like heavy wood or dense bamboo over lightweight plastic that skids.
- Use fixed-fit inserts for permanent zones, placing heavier items in deeper compartments with firmer walls.
You can adapt existing containers with durable dividers, creating defined zones for flatware and tools. Measure twice, fit once, and your organizers will hold position through years of daily use.
Handle Tricky Drawers: Knives, Towels, and Daily Tools
Where do you start when a drawer fights back? You tackle the knife drawer first. Slide in a 14-slot or 7-slot in-drawer knife storage unit with bamboo dividers. Your blades stay unmoved, integrated with existing Cutco sets. Add a dedicated spot for a knife sharpener if you own one.
Start with the drawer that fights back: your knife drawer.
Next, downsize towels from that large knife drawer into a smaller adjacent towel drawer near the sink. Roll towels tightly. Apply a strict rule: if it doesn’t fit, it goes.
For daily tools, get expandable bamboo drawer organizers. Remove rarely used spoons, melon ballers, and extras. Create secondary storage for less-used but important tools.
Put together similar drawers. Reposition frequently used items, utensils, hot pads, and trivets for easy access.
Prioritize in-drawer stability. Choose heavy wood and bamboo dividers over plastic. Your layout stays tidy, predictable, and resists shifting.
Recommended Products

🌿 𝐄𝐗𝐏𝐀𝐍𝐃𝐀𝐁𝐋𝐄 𝐓𝐎 𝐅𝐈𝐓 𝐌𝐎𝐒𝐓 𝐒𝐓𝐀𝐍𝐃𝐀𝐑𝐃 𝐊𝐈𝐓𝐂𝐇𝐄𝐍 𝐃𝐑𝐀𝐖𝐄𝐑𝐒: Our deep bamboo drawer organizer is ideal for saving kitchen storage space, thanks to its adjustable storage drawers that expand from 17”x13” to 17x19.6” wide with 1.9” deep slots. Easy to use and ideal for helping to maximize kitchen storage space, simply pull apart from the sides for additional storage space and a more secure fit for wider drawers. Different sized compartments allow for standard silverware and large utensil placement

[START YOUR KITCHEN ORGANIZATION]: The 10.04" - 15.5" wide, 13.98" long and 1.97" deep bamboo drawer organizer can tame your out-of-control kitchen drawers, to store and organize the cutlery and kitchen utensils according to your rules, and maximize the drawer storage. Keep everything accessible and organized, so that you don't have to rifle around for your cooking tools. Beautiful and practical kitchen drawer organizer turns the cooking and tasting into things of beauty and efficiency.

Sturdy & Protective Design: Made from durable, shatter-resistant ABS plastic for long-lasting daily use. Non-slip silicone pads on both ends help grip drawer walls securely, while cushioning contact to protect the drawers from friction, scratches, and marks
Keep It Organized With One-In, One-Out Rules
Why let your drawers slide back into chaos after all that work? You worked hard on your kitchen drawers, so protect that investment with one-in one-out rules. This system drives lasting clutter reduction without much effort.
Here’s how you lock in your organization:
- For every new item entering a drawer, remove one existing item immediately.
- Apply one-in one-out to each category: flatware, utensils, and linens stay balanced.
- Pair the rule with clear labeling and defined compartments, so you see exactly what lives where.
- Track your progress, noting fewer total items and faster access after 30 days.
You maintain functional space by matching current habits, not past accumulation. Labeling and compartments make replacement decisions obvious.
Your kitchen drawers stay organized because you built a system, not just a one-time fix.
Recommended Products

PREMIUM BAMBOO: Bamboo adjustable drawer dividers are durable, sturdy and have a great design,bringing you super smooth, sturdy & durable drawer dividers for your healthy life.

𝟲 𝗗𝗿𝗮𝘄𝗲𝗿 𝗗𝗶𝘃𝗶𝗱𝗲𝗿𝘀 𝘄𝗶𝘁𝗵 𝟭𝟮 𝗜𝗻𝘀𝗲𝗿𝘁𝘀: Upgrade your drawer organization with adjustable bamboo drawer dividers designed for kitchen, office, and home use. Includes 12 customizable inserts to create multiple sections for cutlery, utensils, makeup, and accessories. Expandable design ensures a perfect fit in different drawer sizes while keeping items neat, tidy, and easy to access. Durable, eco-friendly bamboo construction adds a clean and premium look.

Made of sturdy, sustainably sourced bamboo, it makes a charming accent for any kitchen.