Expert Home Style – For the Price of a Coffee ($3.90)
Master high-end design secrets (Tuscan, Modern) without the expensive consultants.
🛒 Buy NowPenny floors have taken the home decor world by storm. If you’re looking for a unique way to express your style, you might be craving something bold and unexpected. This post is here to inspire you if you love vintage aesthetics or are just curious about creative flooring ideas. I’ve gathered together 18 penny floor designs that’ll make a statement and transform any space.
Whether you’re a DIY enthusiast or a design novice, these ideas cater to all levels of experience. If you appreciate the charm of penny tiles, you’ll find plenty of inspiration here to help you create a stunning focal point in your home. With a mix of classic designs, colorful patterns, and unique twists, you’ll discover how versatile penny floors can be.
Prepare to dive into an impressive array of styles and concepts! You’ll gain insights into everything from classic penny round designs to vibrant mosaics. Plus, I’ll share tips on how to tackle a DIY penny floor project. By the end of this post, you’ll have all the information you need to create a vintage penny floor that truly stands out.
Key Takeaways
– Explore unique designs: Discover diverse styles like classic round patterns and vibrant mosaics that can elevate your home decor.
– DIY tips included: Get practical advice for creating your own penny floor, perfect for both beginners and seasoned DIYers.
– Versatile applications: Learn how penny floors can be used creatively in various spaces, from kitchens to accent walls.
– Colorful options: Find out how to incorporate color into your penny floor designs to reflect your personal style.
– Trends in flooring: Stay updated with current trends in penny tile patterns to ensure your design feels fresh and modern.
Contents
- 1. Classic Penny Round Design
- 2. Mosaic Penny Patterns
- 3. Geometric Shapes
- 4. Penny Borders
- 5. Colorful Penny Splash
- 6. Vintage Patina Look
- 7. Penny Tile Contrast
- 8. Penny Runners
- 9. Penny Stairs
- 10. Penny Accent Walls
- 11. Layered Penny Patterns
- 12. Penny Flower Patterns
- 13. Penny Waves
- 14. Penny and Grout Patterns
- 15. Penny Patterns for Outdoor Spaces
- 16. Customized Penny Designs
- 17. Penny Accents in Commercial Spaces
- 18. Penny Floors for Small Spaces
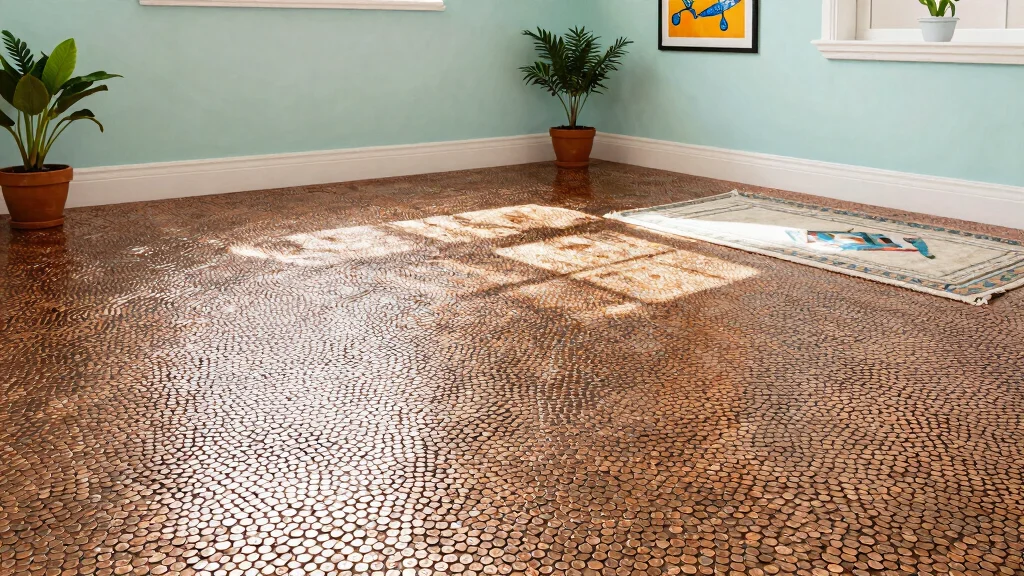
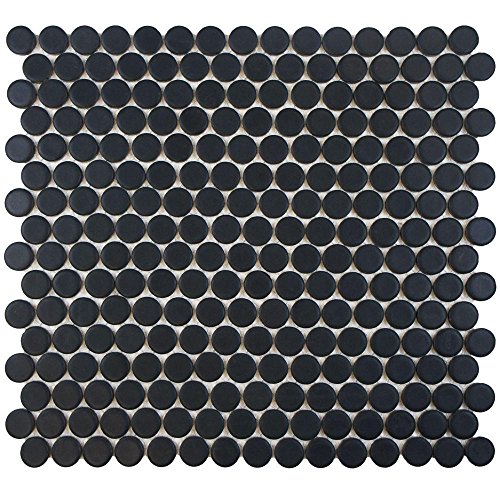
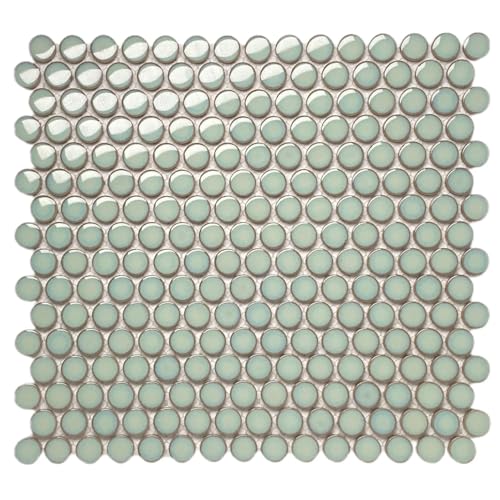
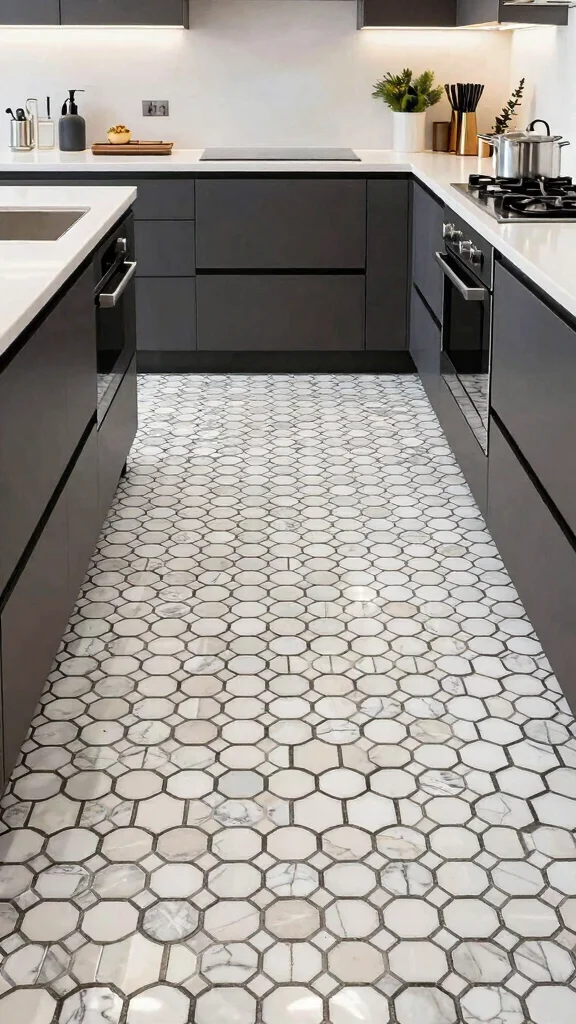
1. Classic Penny Round Design
The classic penny round design is a timeless choice that effortlessly elevates any space. This elegant pattern features rows of shiny pennies arranged in delightful circles, creating a focal point that draws the eye and enhances the character of small areas like entryways or bathrooms. Pairing it with soft wall colors provides sophistication, while bold contrasts can make it a striking centerpiece in your decor. The combination of metallic and soft hues brings warmth and charm into your home.
For implementation, you can easily create this look with a little creativity. Consider sourcing pennies from local shops or even your piggy bank for an affordable DIY project. You can also explore budget-friendly alternatives like adhesive tiles that mimic the penny look while saving on labor and costs.
Consider these tips for your classic penny round design:
– Pair shiny pennies with muted paint colors for balance
– Install in small areas to maximize visual impact
– Use dark grout for a more defined look
– Incorporate penny accents in furniture or decor items
This design not only enhances the aesthetic appeal but also adds a layer of texture that makes your space feel inviting and unique.


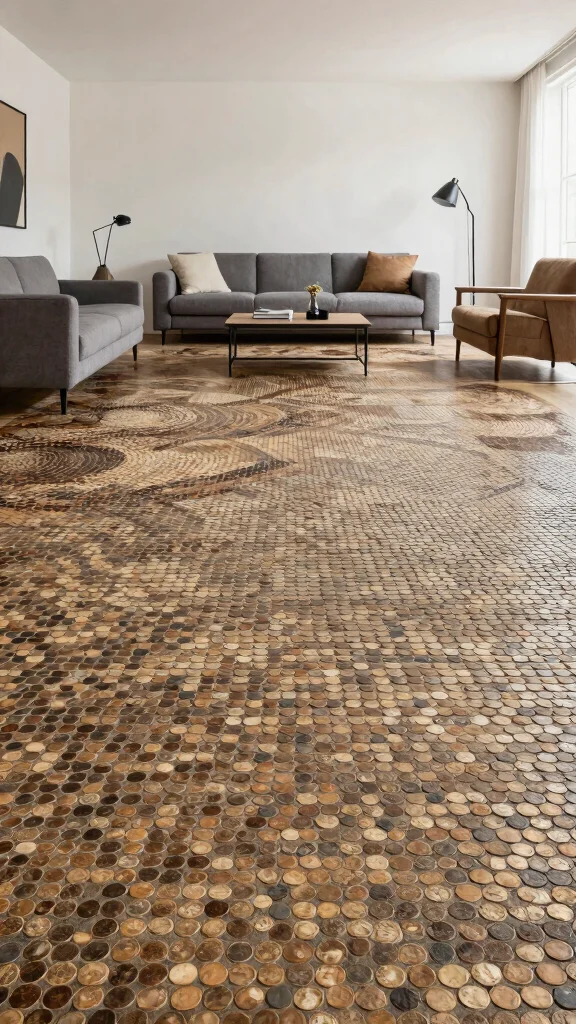
2. Mosaic Penny Patterns

Mosaic penny patterns take your flooring to a whole new artistic level. By incorporating various colors and arrangements, you can create a stunning visual display that adds personality to your home. This playful design is particularly suited for creative spaces like art studios and children’s rooms, where imagination meets functionality. The intricate layouts tell a story, inviting both admiration and creativity.
To achieve a successful mosaic look, planning is crucial. Sketch your design beforehand to visualize the finished product, and consider mixing pennies of different patinas for depth. Templates can help keep your patterns consistent, ensuring a polished finish.
Follow these steps to master your mosaic penny patterns:
– Sketch your design on paper to guide your layout
– Arrange pennies on the floor without adhesive for testing
– Secure with adhesive and let dry before grouting
– Clean excess grout for a flawless final appearance
This approach not only showcases your creativity but also adds a vibrant touch that can uplift the mood of any space.
Turn pennies into art with mosaic penny patterns—start with a simple color palette and sketch your layout. A well-planned penny floor transforms a space, guiding you from blank room to bold studio or cozy kids’ nook.


How To Choose the Right Penny Floor Design
Choosing the right penny floor design can feel overwhelming with so many options available. Here are some key points to help you make the best choice for your space.
1. Consider the Space
Think about where you want to install the penny floor. Different areas serve different functions. For instance, a bathroom might benefit from a waterproof finish, while a kitchen could use a more durable material. Measure the space accurately to ensure your design fits well and complements the overall decor.
2. Material Selection
Penny floors can be made from various materials, including copper, ceramic, and vinyl. Each material has its own charm and durability. Copper provides a vintage look that many homeowners adore, while ceramic offers an easy-to-clean option. Consider your lifestyle, as families with pets or kids might prefer more robust materials.
3. Design Pattern
Penny tile patterns can dramatically change the vibe of a room. Think about whether you want a classic round penny design or a more intricate mosaic. Geometric shapes or flower patterns can add a unique touch. Explore samples to visualize how different patterns will change the look of your space.
4. Color Choices
Color plays a vital role in the mood of a room. Classic copper tones can give a warm, vintage feel, while colorful penny tiles can make a bold statement. If you prefer subtlety, choose neutral colors that match your existing decor. Don’t forget to consider how the color will look throughout the day with different lighting.
5. Budget Constraints
Penny floors can vary widely in price. Determine your budget before diving into designs. Remember to factor in not just the cost of materials, but also installation costs if you’re hiring a professional. DIY projects can save you money, but ensure you have the skills and tools necessary to complete the job.
6. Maintenance Requirements
Different materials will have different maintenance needs. Ceramic and vinyl may require less upkeep compared to copper, which may need periodic polishing to maintain its luster. Choose a design that fits your willingness to maintain the flooring over time. If you prefer low-maintenance options, focus on finishes that resist stains and dirt.
Pro Tip: Always request samples before making a final decision. This allows you to see how the colors and patterns work together in your home’s lighting. It’s a great way to visualize your penny floor design in context!
Choosing the right penny floor design can enhance your home’s aesthetic and functionality. Take your time, consider your options, and make a choice that fits your style and needs.
3. Geometric Shapes
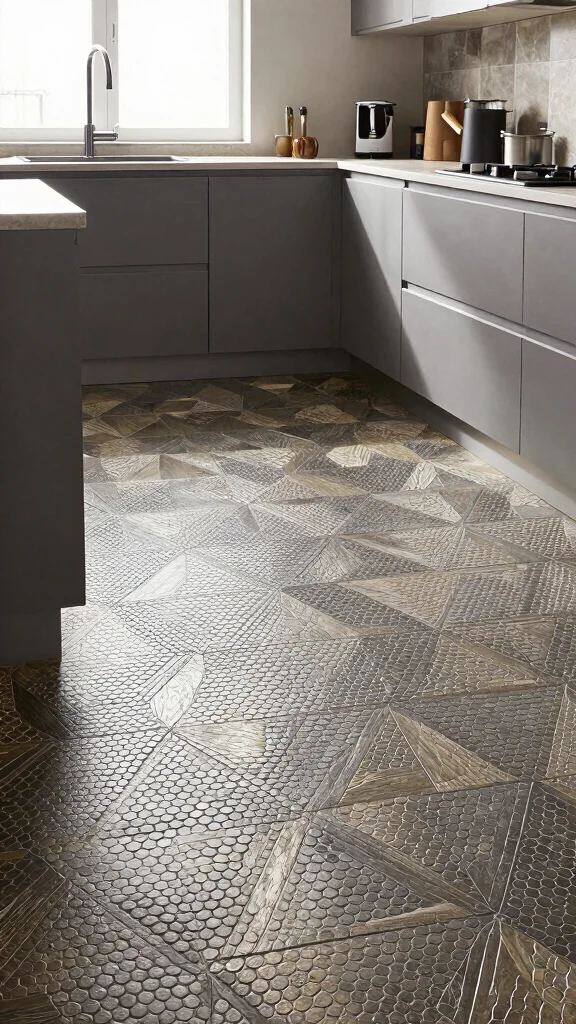
Infuse modern aesthetics into your home with geometric shapes in your penny floor design. Arranging triangles, squares, or hexagons can create a sleek and contemporary look that captures attention and adds sophistication. This style works beautifully in open spaces, giving the illusion of a larger area while maintaining an artistic flair that feels both fresh and inviting.
To achieve this design, start by selecting a color palette that complements your current decor. Mixing shiny and tarnished pennies can create interesting textures, while precise geometry ensures a clean finish.
Here are steps to create your geometric penny floor:
– Choose your geometric pattern and gather necessary materials
– Use a grid system for accurate measurements and layouts
– Ensure snug fits between pieces to avoid gaps
– Apply adhesive and grout for a polished and finished look
This design not only enhances your home’s contemporary vibe but also brings an element of fun to your flooring.


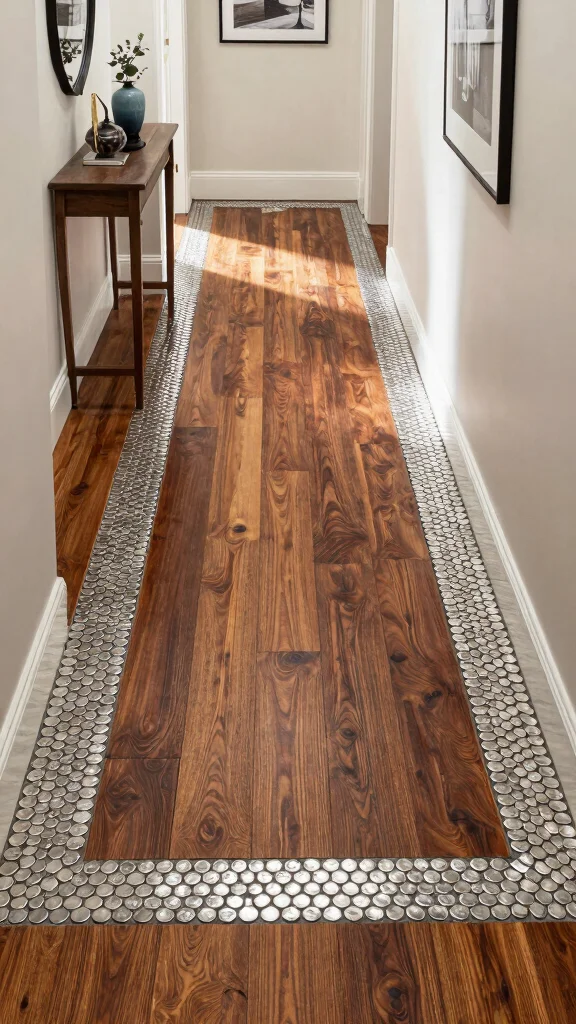
4. Penny Borders
For a subtle yet distinctive approach, consider adding penny borders to frame traditional flooring. This design allows you to introduce personality without overwhelming your main floors, highlighting beautiful hardwood or tile with a vintage charm. Penny borders can be a perfect solution for those wanting to dip their toes into penny flooring without a full commitment.
To ensure a successful border, maintain consistent width and choose contrasting colors that make the border stand out. You can even incorporate a simple pattern within the border for added detail and interest.
Implement these steps for your penny border design:
– Mark the desired width for your border on the floor
– Lay pennies along the marked line using adhesive
– Grout and seal to ensure a pristine finish
This approach enhances the overall aesthetic while maintaining a classic look that complements your existing decor.
5. Colorful Penny Splash
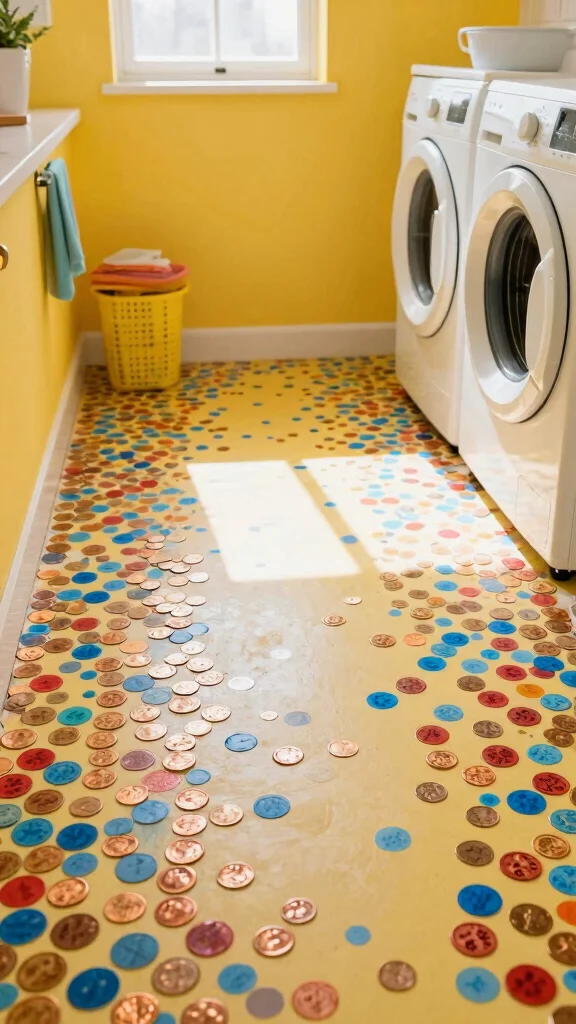
Brighten your space with a colorful penny splash! By incorporating vibrant colored pennies into your flooring, you can create lively patterns that instantly uplift any room’s mood. This playful design is great for laundry rooms or kitchens, showcasing creativity while adding a fun twist to your home decor.
For a successful colorful splash, plan your color scheme carefully and consider pairing it with bright wall colors to enhance the cheerful ambiance. Utilizing unexpected spaces, like hallways, can add an element of surprise and delight.
Here’s how to achieve your colorful penny splash:
– Select a palette that reflects your personal style
– Lay out colored pennies in your intended pattern before securing
– Use a clear sealant to protect and enhance color vibrancy
This design approach not only brings energy to your space but also showcases your unique style through creative expression.


6. Vintage Patina Look
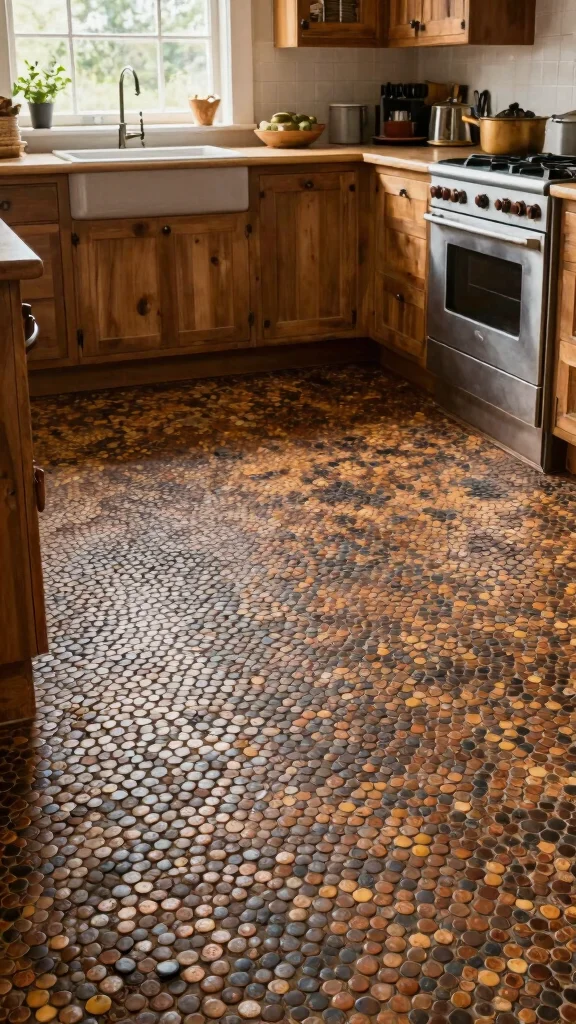
If you cherish a rustic, vintage vibe, the patina look for your penny floor is a fantastic choice. Embracing the natural aging of pennies showcases rich tones and textures that instantly add warmth and character to spaces like country-style kitchens or cozy living rooms. This design makes your home feel inviting and timeless.
For the best results, select pennies with varying degrees of patina to create greater depth. Pairing this look with rustic decor, such as wooden beams or vintage furnishings, enhances the overall charm of the space.
Follow these steps to achieve a vintage patina look:
– Collect a mix of new and old pennies for authenticity
– Arrange pennies without adhesive to visualize your layout
– Secure and apply a matte sealant for a soft finish
This design not only creates an inviting atmosphere but also tells a story through the natural beauty of aged materials.
7. Penny Tile Contrast
Introducing penny tiles can create a stunning contrast when paired with other flooring materials. Imagine a glossy penny floor bordered by rich hardwood or sleek tiles, resulting in an eye-catching effect that elevates the sophistication of your space. This design is perfect for modern homes that favor mixed materials, offering endless creative opportunities.
For a striking look, use a contrasting border and ensure smooth transitions between different flooring types. Playing with patterns in the penny tiles can also enhance visual interest while maintaining a cohesive design.
Here’s how to create this look:
– Decide on your primary flooring material and measure accordingly
– Plan your penny layout to align with borders for a seamless look
– Secure the pennies and finish with appropriate grouting and sealing
This design not only captivates attention but also adds layers of texture and depth to your flooring.
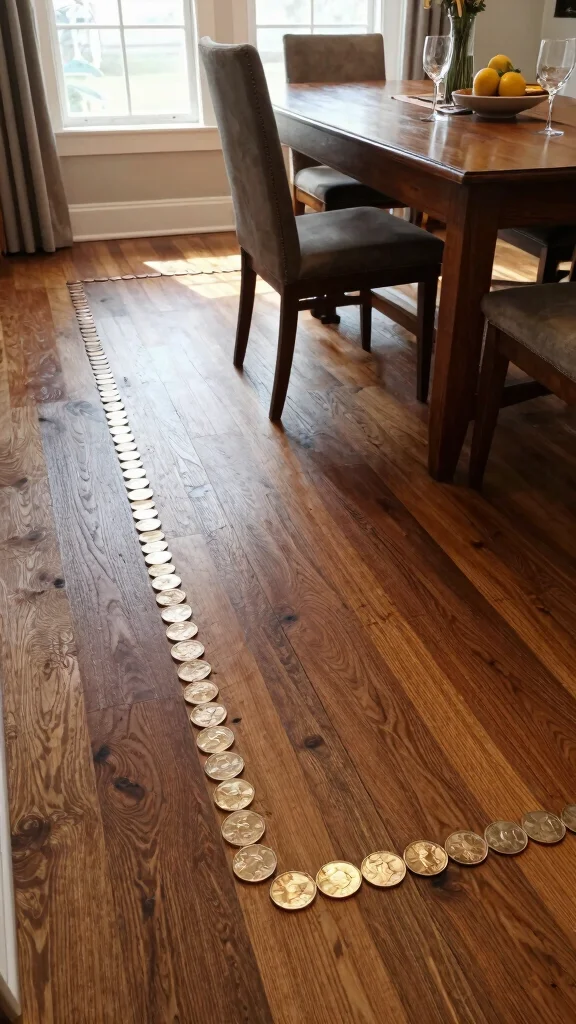
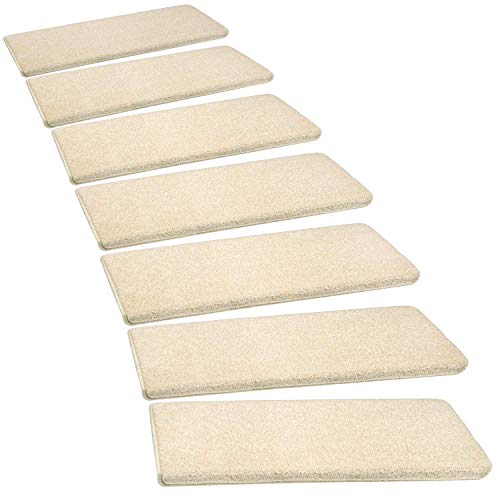
8. Penny Runners
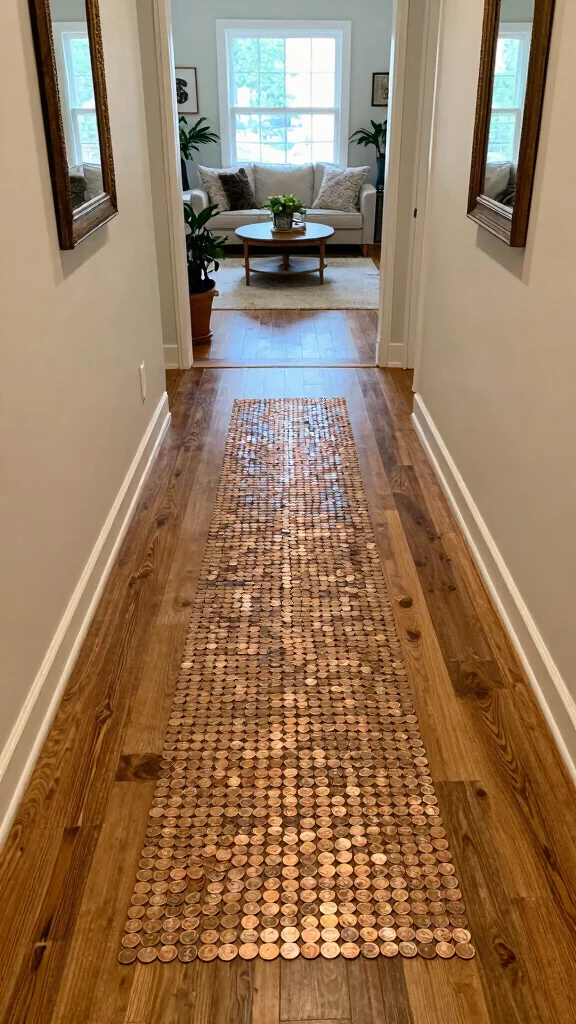
Enhance your home’s character with penny runners! This approach allows you to incorporate penny flooring in a more subtle, less permanent way. Penny runners can accentuate paths in hallways or entryways, guiding guests while making a striking visual statement. Their flexibility lets you change designs as your style evolves.
For optimal results, choose a width that fits your space and allows for easy movement. Mixing and matching penny colors within the runner can add flair, while ensuring non-slip backing keeps it safe.
Here are the steps for your penny runner:
– Measure the desired length and mark the area
– Lay out the pennies in your chosen design before securing
– Adhere pennies with adhesive and allow drying before use
This design not only adds character but also creates a welcoming atmosphere as you guide guests through your home.


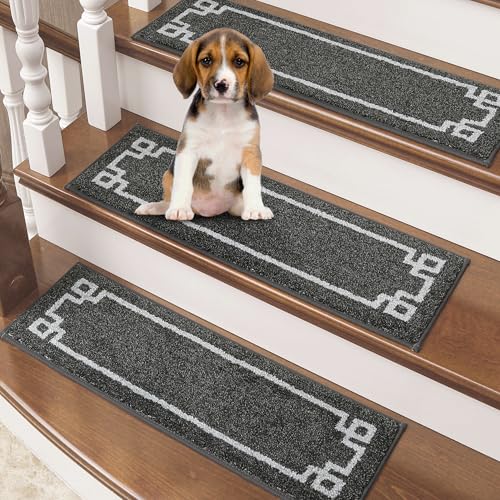
9. Penny Stairs
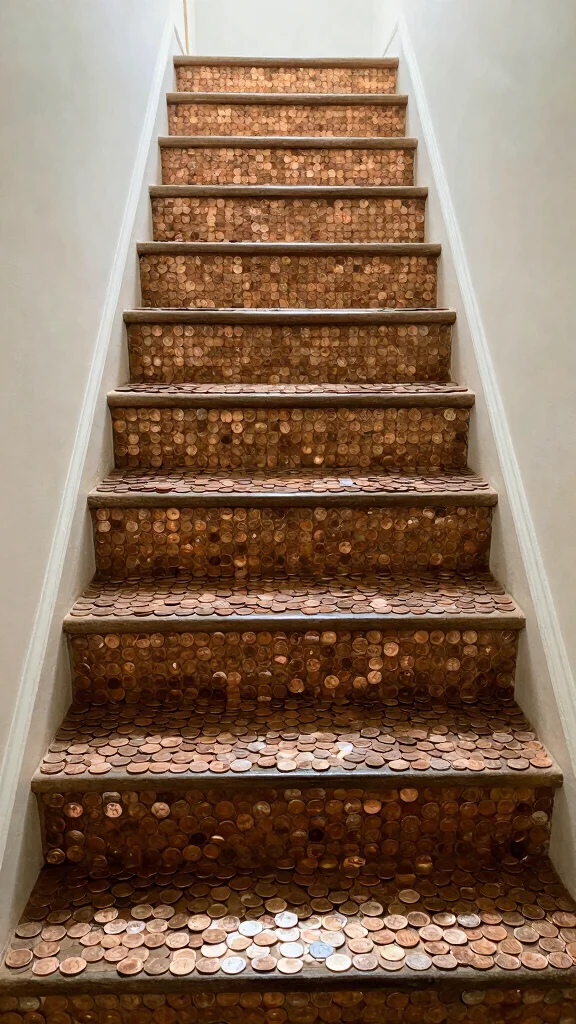
Why limit penny floors to the ground level? Penny stairs are a bold and elegant choice to incorporate this unique design element throughout your home. Imagine climbing a staircase adorned with shiny pennies, creating a visual experience that stands out beautifully. This dramatic touch complements modern and eclectic styles with flair.
When designing your penny stairs, prioritize safety measures to avoid slipping, and consider using a non-slip sealant for added security. Pairing with neutral wall colors can create a stunning contrast that highlights the penny design.
To install penny stairs:
– Clean the stair surface thoroughly before laying pennies
– Measure and cut pennies to fit the stair dimensions
– Secure with adhesive and apply grout as needed
This design not only enhances functionality but also transforms your staircase into a striking focal point.


10. Penny Accent Walls
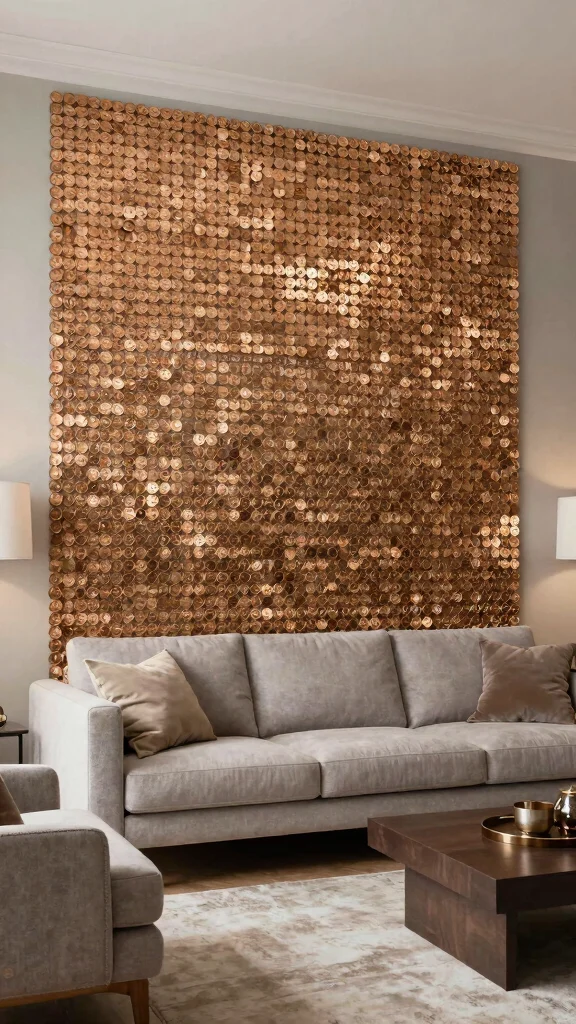
Looking for a creative way to incorporate pennies without flooring? Consider penny accent walls! This trend allows you to create a stunning feature wall using pennies, adding texture and visual interest to any room. Ideal for living rooms or home offices, this approach makes a bold statement without overwhelming the decor.
For a successful accent wall, pair it with complementary colors and choose a wall that naturally draws attention, such as one behind a sofa. Proper sealing is essential to protect the pennies and enhance their shine.
Follow these steps for your penny accent wall:
– Prepare the wall by ensuring it is clean and even
– Layout your design on the wall before adhering
– Secure pennies with adhesive and seal once dry
This design approach offers a unique way to showcase personality and creativity while enhancing your space’s overall charm.


11. Layered Penny Patterns
Layered penny patterns present a dynamic approach to penny flooring, combining various designs or colors for a uniquely textured look. This method creates visual depth, making the floor a lively focal point that draws the eye. Ideal for larger spaces, layered patterns can be tailored to fit personal style while ensuring a cohesive overall design.
To create this look, experiment with different shades and sizes of pennies. Alternating patterns can enhance complexity while ensuring smooth transitions between layers for a polished finish.
Here’s how to install layered penny patterns:
– Design your layered pattern considering different heights or colors
– Secure the base layer before adding additional layers
– Grout and seal to maintain clarity and durability
This design not only adds a unique touch but also brings a sense of movement to your flooring.
12. Penny Flower Patterns
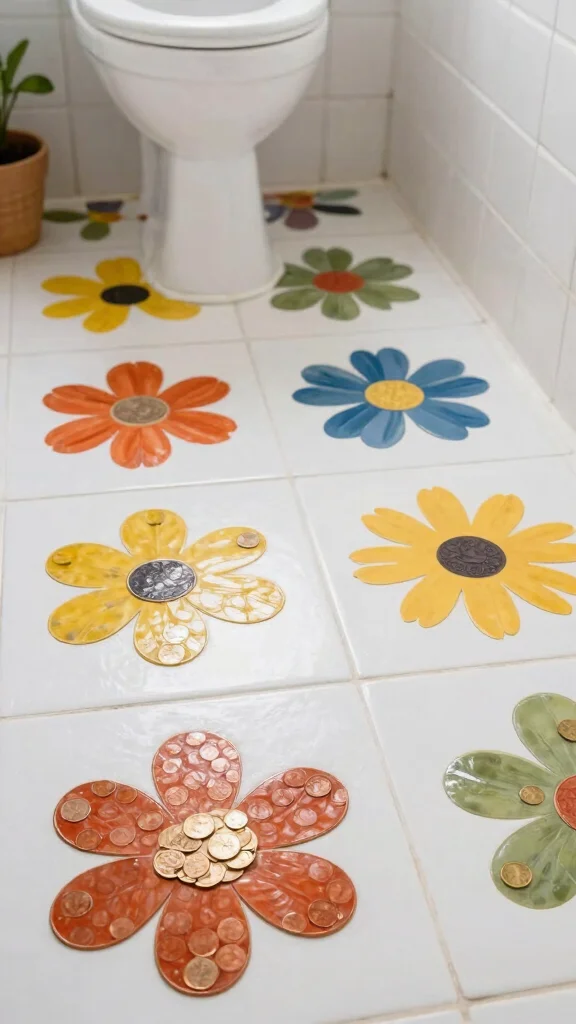
Embrace your creativity with penny flower patterns that transform traditional flooring into a whimsical garden display. By arranging pennies in floral motifs, you can bring a touch of nature indoors while retaining the elegance of penny flooring. This design is perfect for children’s rooms, sunrooms, or whimsical bathrooms, making a delightful statement.
When designing your flower patterns, select colors that evoke a natural floral vibe and use contrasting colors for the background to highlight the flowers. Ensure the proportions are balanced for a cohesive look.
To install penny flower patterns:
– Sketch your flower designs on paper for visualization
– Lay out pennies for petals and centers before securing
– Apply adhesive and grout to secure your designs
This playful approach not only adds charm but also invites a sense of joy and nature into your home.


13. Penny Waves
Penny waves create a flowing design that adds movement to your flooring. This style arranges pennies to mimic the visual rhythm of waves, resulting in a dynamic and intriguing surface that captures attention. Ideal for creative spaces or relaxed environments, this design brings a calm and soothing effect to any room.
For successful implementation, consider a monochromatic color scheme for a sleek look and experiment with different wave heights for added depth. Ensuring smooth transitions between wave patterns will enhance the polished finish.
Here’s how to install penny waves:
– Sketch your wave design to set the pattern
– Lay pennies in the wave formation, securing as you go
– Grout between the pennies for stability and a neat finish
This design not only captivates but also introduces a sense of movement and flow to your space.
Fun fact: Penny waves on a penny floor create visual rhythm equivalent to a 4–6 inch crest in real waves. For best impact, use a monochromatic palette and vary wave heights to add depth.


14. Penny and Grout Patterns
Combining pennies with grout patterns elevates your flooring design. Use contrasting grout to create outlines or geometric shapes within the penny layout, enhancing the overall visual impact. This technique adds structure to the softness of the pennies, making it suitable for contemporary or modern homes.
To achieve a successful look, experiment with different grout colors for a more dramatic effect, and keep patterns consistent for a cohesive appearance. Proper sealing will maintain the beauty of both the pennies and grout.
Follow these steps for your penny and grout patterns:
– Decide on your grout pattern and lay out the pennies accordingly
– Secure pennies with adhesive before grouting
– Fill in the patterns with grout and clean excess for a neat finish
This design approach brings sophistication and creativity to your flooring, making a lasting impression.


15. Penny Patterns for Outdoor Spaces
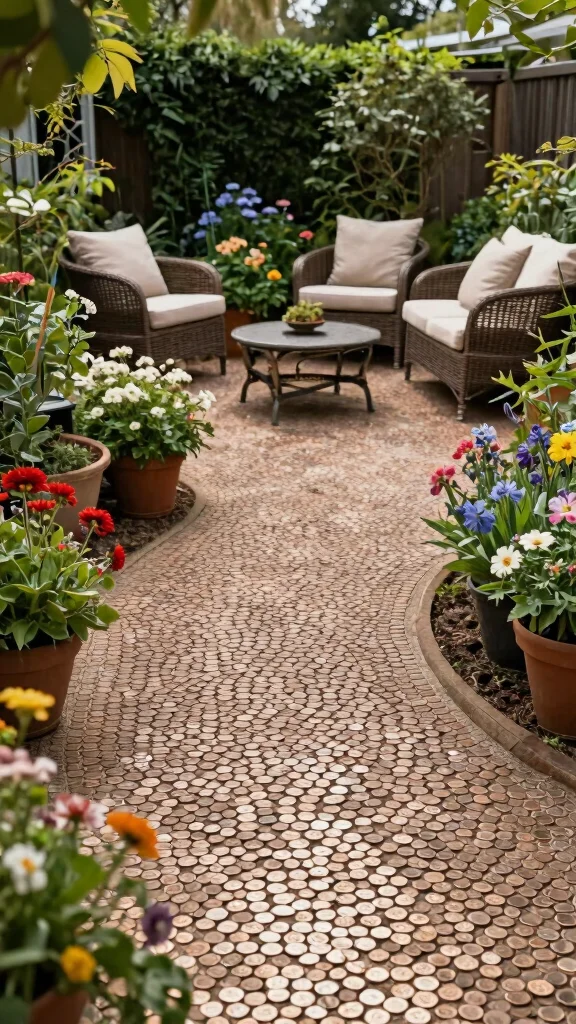
Don’t forget your outdoor areas! Penny patterns can be effectively incorporated into patio designs and garden paths. By selecting outdoor-friendly materials, you can extend the charming appeal of penny flooring to your garden, creating a unique atmosphere that ties in with your interior design.
For a successful outdoor design, use weatherproof sealants to protect the pennies from the elements. Incorporating natural surroundings will create a harmonious look, while considering patterns that flow with the garden layout enhances the overall aesthetic.
Here’s how to implement penny patterns outdoors:
– Prepare the outdoor surface to ensure it’s level
– Plan your penny layout to suit the outdoor area
– Secure the pennies as you would indoors, ensuring proper sealing
This design not only enhances outdoor spaces but also creates a cohesive flow between your indoor and outdoor environments.
16. Customized Penny Designs
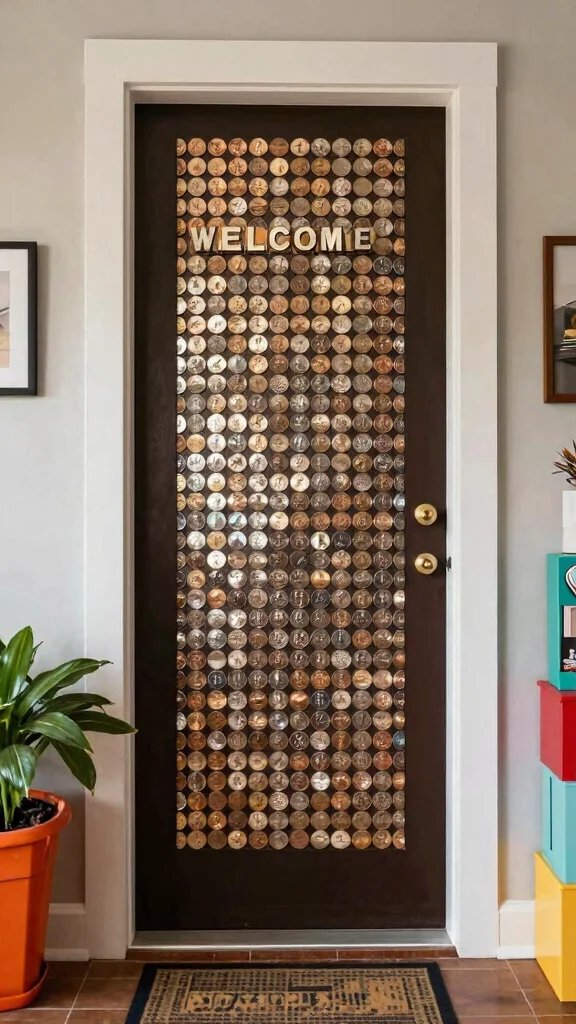
Why settle for standard designs when you can personalize your penny flooring? Crafting unique layouts with messages or initials from pennies allows you to infuse your personality into each space. This design creates an unforgettable entryway or a unique focal point in any room, leaving a lasting impression on guests.
For clarity in your message, choose a clear design and use different penny finishes to enhance visual appeal. Consider size and layout to maximize impact and ensure your design stands out.
Follow these steps for customized penny designs:
– Design your layout on paper, including any messages or patterns
– Lay out the pennies according to your chosen configuration
– Secure them with adhesive and grout for stability
This creative approach not only showcases your unique style but also transforms flooring into a canvas of personal expression.


17. Penny Accents in Commercial Spaces
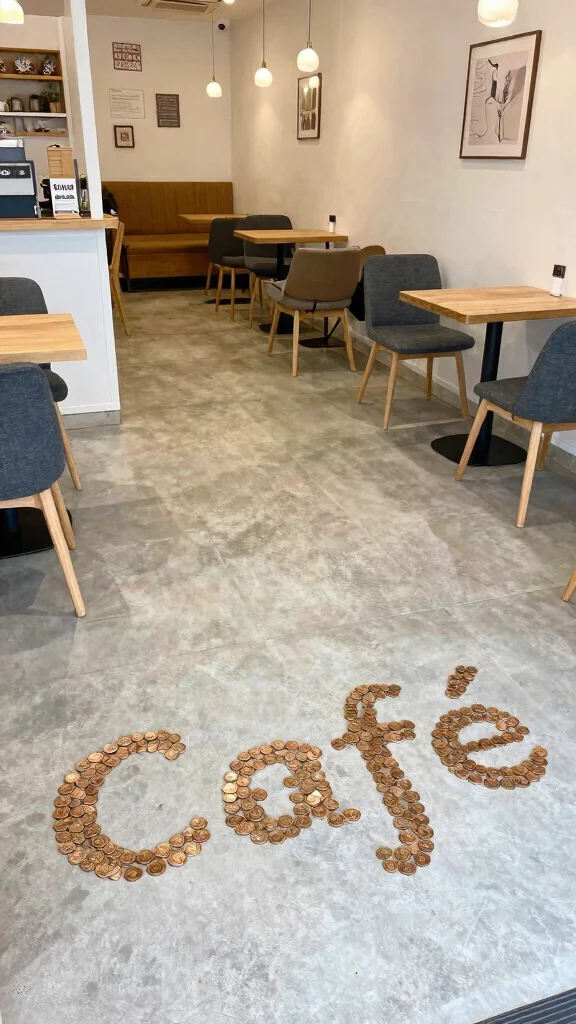
Penny flooring isn’t just for homes; many commercial spaces are embracing this unique choice to add character and whimsy. From cafes to boutique shops, penny floors can create a memorable first impression that attracts customers and makes their visit unforgettable. Utilizing funky patterns or vibrant colors can elevate the overall atmosphere of your business.
For commercial spaces, ensure durability with a strong sealant finish, and maintain design continuity throughout the space. Creating a narrative through your flooring design can engage customers and enhance their experience.
Here’s how to implement penny accents in commercial spaces:
– Plan your design to suit the theme of your business
– Arrange the pennies to flow with the layout of the space
– Secure and finish properly for a polished, professional look
This design approach not only captivates attention but also enhances the overall customer experience, making your space truly unique.
❝ Did you know penny floors can last 20+ years with a durable sealant? In cafes and boutique spaces, this bold penny floor creates a memorable first impression that boosts foot traffic and encourages customers to linger—and snap photos for social proof.
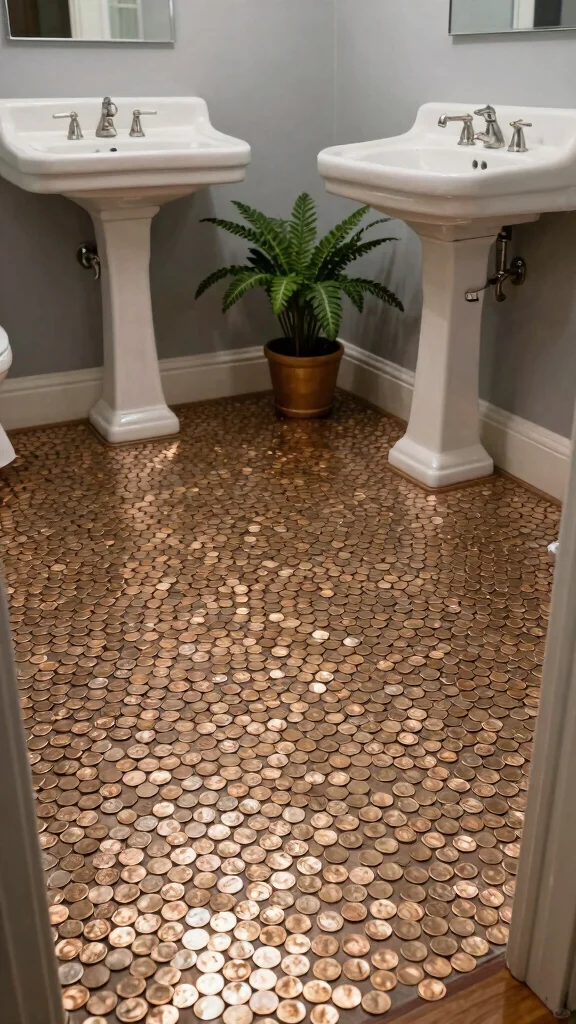
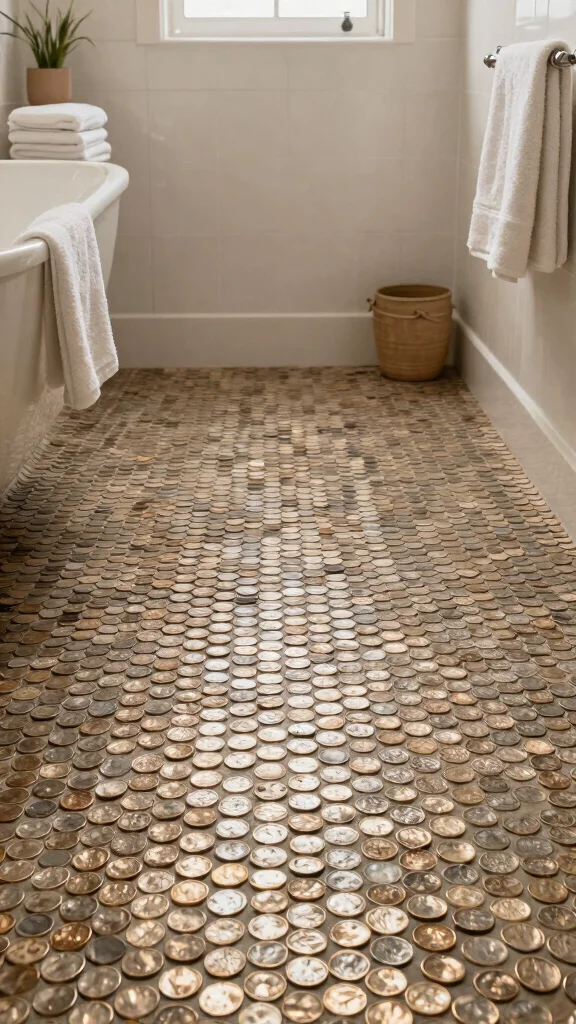
18. Penny Floors for Small Spaces
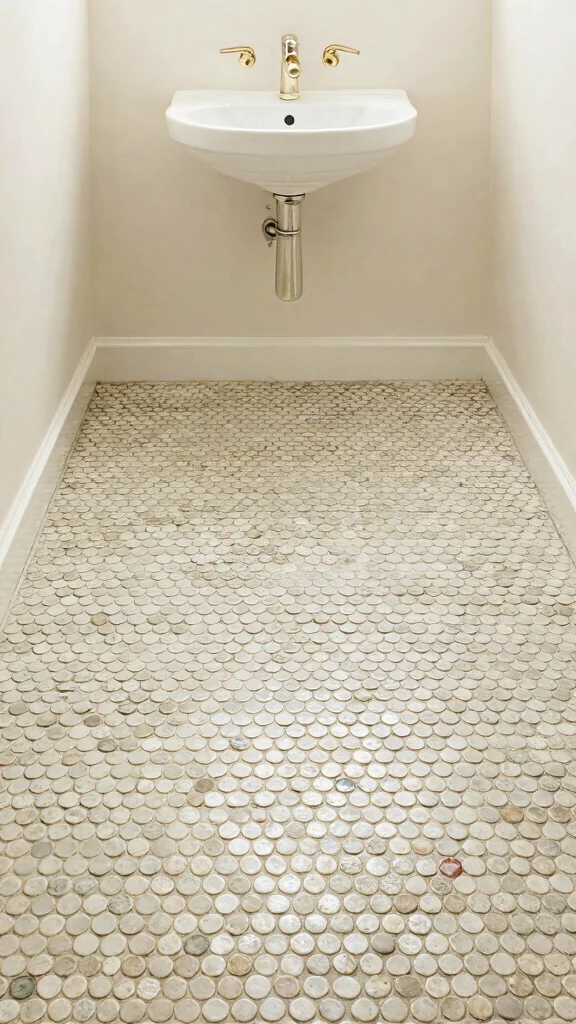
Small spaces can greatly benefit from penny flooring! When designed thoughtfully, pennies can create an illusion of space while adding a unique touch. Opt for lighter colors or subtle patterns to keep the area feeling airy and bright. This design is ideal for entryways, bathrooms, and kitchens, where every bit of style counts.
For optimal results, use light-colored pennies to enhance brightness, and avoid busy patterns that might overwhelm the area. Clear sealants can help maintain a fresh look and protect the surface.
Here’s how to implement penny floors in small spaces:
– Measure accurately to determine penny needs
– Plan a simple layout that enhances the area
– Secure pennies and finish with a durable sealant
This design not only maximizes style in small spaces but also adds character and charm that makes a lasting impression.
Conclusion
Penny flooring is a fantastic way to inject personality and creativity into your home decor. With so many design options, from classic patterns to modern twists, there’s a style that can fit any space. Whether you’re a DIY enthusiast or prefer to hire a pro, penny floors offer a unique charm that transforms any room. Which design inspired you the most?
Frequently Asked Questions
What exactly is a penny floor, and why is it such a bold penny floor design?
A penny floor is a surface built from small coins or coin-inspired tiles arranged into patterns to create a warm coppery surface. This penny floor design makes a striking statement with its texture and color. For a DIY penny floor, you can use authentic pennies (often pre-1982) or ready-made penny tile patterns sheets. Practical steps include planning a layout (grid, circular radii, or mosaic), prepping a flat subfloor, cleaning and sorting pennies or laying penny tiles, applying a durable adhesive, setting the pieces, grouting if needed, and sealing with an epoxy topcoat or penetrating sealer. Pro tip: thorough sealing protects the copper finish and reduces tarnish for a lasting bold look.
Which penny floor design patterns work best for small spaces or entryways?
For small spaces, choose repeating penny tile patterns that maximize impact with minimal waste—think a tight grid, a subtle herringbone, or a circular focal medallion. A simple grid offers classic charm, while a radial or mosaic motif can create the illusion of more space. Map your layout on paper first, then transfer it to the floor with painter’s tape. If you want speed, use penny tile patterns sheets and trim only where needed. Pair the copper tones with warm lighting to amplify the bold creative home decor effect.
Can a penny floor be used in kitchens or bathrooms, and what should I know about wet areas?
Yes, you can use a penny floor in kitchens or bathrooms, but moisture protection is essential. Use water‑resistant adhesives, a waterproof membrane underlay, and seal the finished surface with a durable epoxy or penetrating sealer to keep the copper color looking vibrant. If using authentic coins, consider penny tile sheets designed for wet areas to simplify maintenance. Clean regularly with a mild soap solution and a soft mop to preserve the penny floor finish without dulling the shine.
How much does a DIY penny floor typically cost and what materials will I need?
Costs vary based on whether you use authentic pennies or penny tile sheets. A DIY penny floor path is possible on a budget if you source pennies yourself, but sheets or kits speed installation. You’ll need a flat subfloor, a suitable adhesive, optional grout if you’re using loose pennies, a durable sealer (epoxy or penetrating), proper tools (level, trowel, spacers, cutter), and pennies or penny tiles. Plan for extra material to account for pattern matching and waste. The result is a unique penny floor design that doubles as standout creative home decor.
How do I maintain and refresh my penny floor to keep its bold look over time?
Keep it bold with simple upkeep: clean with a mild soap solution and a soft mop, avoid harsh chemicals that can dull the finish, and re‑seal every 1–3 years depending on foot traffic. If any pennies wear or lift, you can re‑set those spots without redoing the entire floor. Periodically check grout lines or the surface of penny tile sheets for looseness and repair as needed. With regular care, your penny floor remains a standout piece in your creative home decor.
Related Topics
home decor
penny floor
vintage style
DIY penny floor
unique flooring ideas
penny tile patterns
creative home decor
budget friendly
beginner friendly
flooring trends
modern vintage
easy DIY