
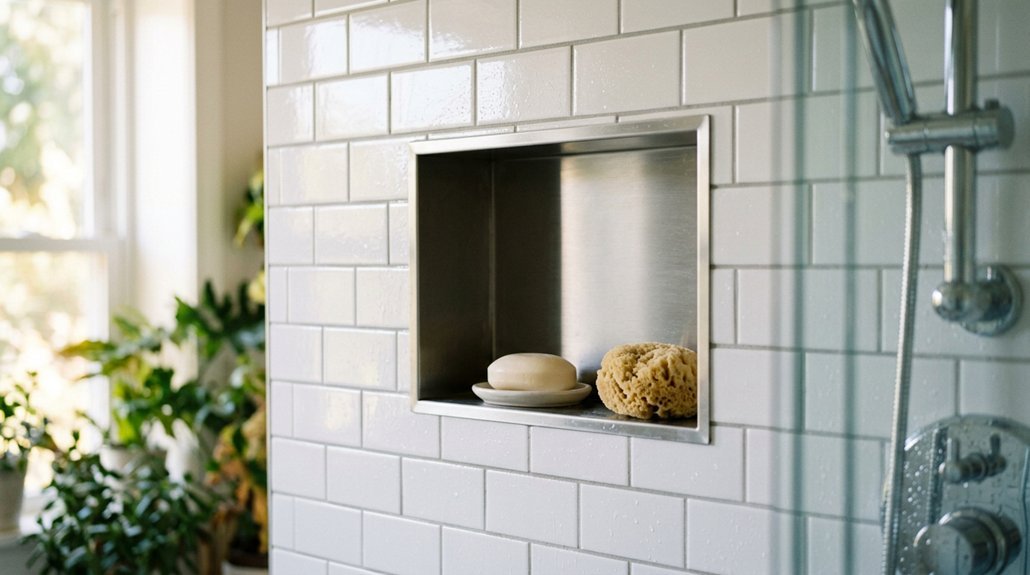


You’re about to gain seven clear steps for installing a shower niche that won’t leak, sag, or fail. You’ll choose between pre-made foam units (faster, pricier) or site-built tile versions (custom, labor-intensive). You’ll frame precisely between 16-inch studs, waterproof every seam with fabric and liquid membrane, and tile with proper slope on shelves.
The difference between a niche that lasts 20 years and one that molds within months comes down to details most guides skip. Here’s what actually works.
Decide Between Pre-Made or Built-In Shower Niches
Why start with the hard way when you don’t have to? You’re choosing between pre-made vs built-in, and this decision shapes your entire installation.
Why tackle the hard way when pre-made niches eliminate waterproofing headaches and save hours of labor?
Pre-made options arrive 100% waterproof with tile-ready surfaces. You skip extensive on-site waterproofing, saving hours of labor. Built-in niches demand custom framing, careful waterproofing, and precise tile alignment.
For straightforward results, consider a Kerdi board niche with two shelves. It handles waterproofing seamlessly, though you’ll pay more upfront.
Placement matters: position your shower niche on the least visible wall, between studs, before installing surrounding cement board. This ensures solid support and clean integration.
Your choice boils down to convenience versus customization. Pre-made delivers speed and certainty; built-in offers tailored dimensions. Most DIYers benefit from the simpler path.
Recommended Products

Complete Waterproof Seal Kit: Includes two 4-1/2 inch shower valve seals and two 3/4 inch pipe seals to protect plumbing penetrations during tile shower installation. One kit covers both valve and pipe waterproofing needs
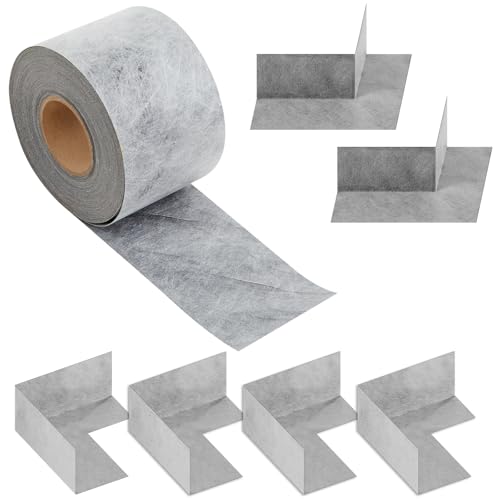
Waterproof Membrane Kit: this waterproof sealing kit includes 4 inside waterproof membrane sheets, 2 outside waterproof corner membrane sheets, and 1 roll of 0.42 x 100 ft (42 Sq ft ) waterproof membrane; Made of high density polyethylene, this shower enclosure waterproof membrane seam tape effectively waterproofs and prevents moisture, meeting diverse user needs

MULTI-USE. The XFasten Basement wall moisture barrier can be used as a waterproofing material for decks, underlayment tile, heat sensitive tile, cement board, shower walls, pans, liners, niche, and curbs, RV surface, and other hard to reach curve surfaces.
Assemble Tools, Adhesives, and Sealants
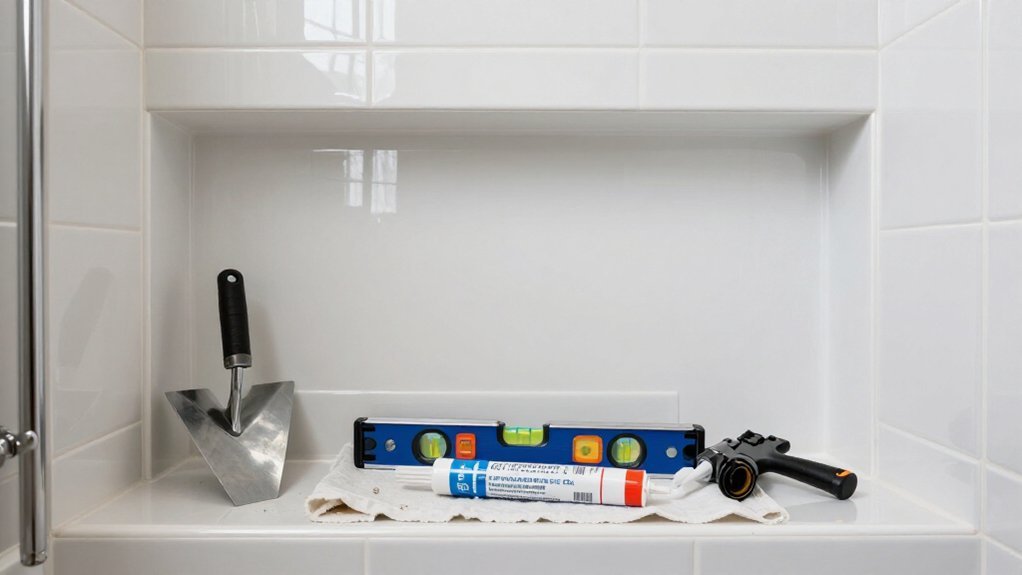
You’ll need protective eyewear, measuring tape, a utility knife, level, and a hand or circular saw to start, plus a drill with bits, a jigsaw for holes, and a caulking gun sized for 10.3 oz adhesive tubes. Choose a waterproof adhesive that bonds to PVC panels, such as Loctite Power Grab Ultimate white, Titebond Titegrab Ultimate, Liquid Nails Fuze It, or Manus 75-AM HV, and pair it with a silicone-based sealant for the joints.
Optional matching trim is available, and you’ll apply adhesive as a bead along the niche’s bottom only, keeping the sides and top clean for proper placement.
Recommended Products

Waterproof Shower Niche - Provides a fully waterproof surface, perfect for showers and wet areas, ensuring long-lasting durability.

Perfect Fit for Shower Niche Shelf: The niche shelf is designed for use with Schluter-KERDI-BOARD-SN/SNLT 20″and 28″shower niches. This niche shelf for tiled showers ensures seamless compatibility with models like SNS1D5MGS, SNS1D5EB, SNS1D5MBW, SNS1D5TSBG, SNS1D5TSC, SNS1D5TSSG, SNS1D6MGS, and SNS1D6EB

Long-Term Coverage - Backed by a 10-year limited warranty against manufacturing defects when installed per the Schluter Installation Handbook and Technical Data Sheet, following all guidelines and industry standards in effect at the time.
Required Safety Equipment
Before you cut a single board, gather your gear. Your shower niche project demands proper safety gear, starting with protective eyewear. You’ll shield your eyes from dust and debris while operating cutting tools, so don’t skip this step.
You’ll also need a measuring tape, utility knife, and level in your basic kit. For precision work, grab a drill bit set and jig saw. A caulking gun plus a 10.3 oz adhesive tube secures panels firmly.
For waterproofing, you’ll apply silicone-based sealant to all seams. Choose PVC panel adhesives like Loctite Power Grab Ultimate white, Titebond Titegrab Ultimate, Liquid Nails Fuze It, or Manus 75-AM HV. Have matching trim and waterproofing membranes or backer boards ready to seal the niche opening completely.
Follow Schluter Kerdi Board video tutorials for step-by-step guidance.
Essential Cutting Tools
What tools do you actually need to get this niche cut right? You’ll need reliable cutting tools to create clean, precise openings for your shower niche during these installation steps.
Grab a utility knife for scoring and trimming edges, plus a hand saw or circular saw for straight cuts through wall material. Keep a jigsaw handy for cutting the actual niche opening, and always check your work with a level so sides stay plumb and square.
Use a drill with proper bits for starter holes, and a measuring tape to confirm your opening matches the shower niche dimensions exactly. Wear eye protection when cutting PVC panels or foam backer boards, and select waterproofing-compatible adhesives like Loctite Power Grab Ultimate to seal edges before tiling.
Adhesives and Sealants
With your cutting tools ready, it’s time to pick the right adhesives and sealants for a leak-free installation. You’ll need a 10.3 oz adhesive tube and a caulking gun to secure PVC panels and install your shower niche perimeters.
Apply a bead of adhesive on the back side of the niche flange, about 1/2 inch from the outside edge. Run adhesive around the entire perimeter before seating the shower niche. Place a small bead of sealant near the outside edge prior to placement.
Seal around the entire perimeter after installation for a watertight fit. Wipe away excess sealant after seating the niche. Optionally, add a top-edge sealant bead for extra protection.
For best results, use silicone-based sealant plus your chosen adhesive, such as Loctite Power Grab Ultimate, Titebond Titegrab Ultimate, or Liquid Nails Fuze It. This ensures a durable, waterproof bond.
Frame and Prep Your Stud Bay for the Niche Opening
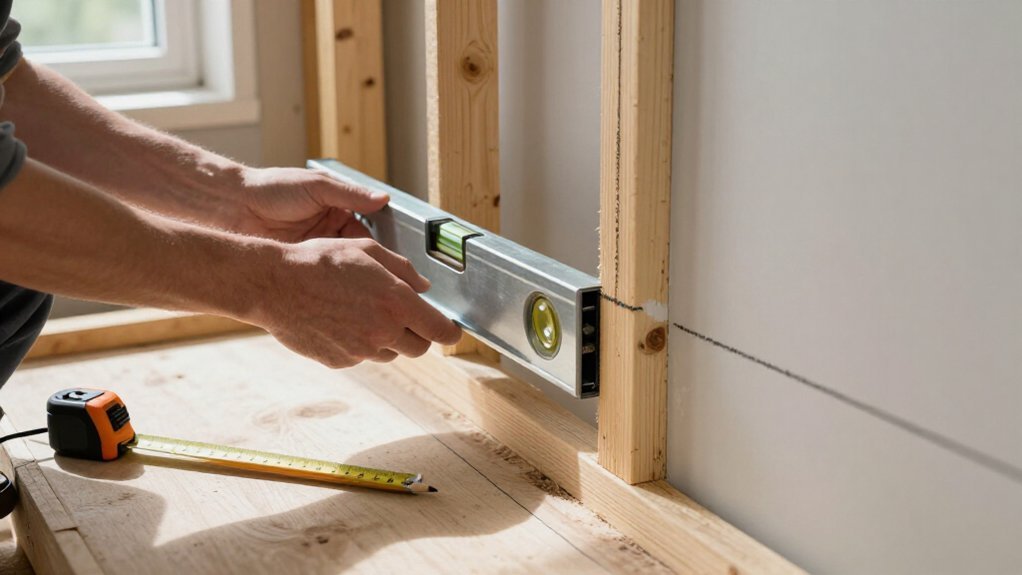
Where exactly will your shower niche sit? You’ll locate and mark your wall studs first, because each vertical side needs a stud for full support. This shower niche framing step determines everything that follows.
Locate your studs first—each niche side needs full support, and this framing step determines everything that follows.
For proper stud bay preparation, you’ll sometimes remove a warped stud and insert horizontal braces. Cut them to align with the pan edge, reducing your bay to about 13 1/8 inches. You’ll build double studs on both sides, creating structural posts that support the opening and future shelves.
Your niche opening alignment matters. Check that it’s plumb and straight, shifting slightly right if needed.
Your bottom brace slope requires attention too. Angle it 1/16 inch front-to-back. This subtle tilt helps tile and base align while giving you a stable niche base.
Recommended Products

Prefabricated vinyl shower niche is fully sealed for hassle-free, quick and easy installation

Pre-Sloped Base Design: Upgrade your bathroom with the W-S Shower Niche by GURU USA; The shower niche features a 1.9% pre-sloped base, ensuring proper water drainage and preventing any unwanted moisture buildup

Prefabricated vinyl shower niche is fully sealed for hassle-free, quick and easy installation
Size and Seal Your Backerboard Panels
How do you keep water from sneaking behind your tiles? You’ll use Wedi backer panels, which act as both your wall support and waterproofing barrier in one solid piece.
Start by cutting the back panel to fit your niche opening. Slide it inside first, pressing it flush against the framing. Keep it clear of any drywall at the rear.
Next, size your side pieces, overlapping them slightly where they meet the back panel. This overlap creates a watertight seam.
Run a minimal bead of seam sealant along every joint and edge. Don’t skimp here, gaps invite leaks.
Finally, address the Z notch at the base perimeter. Cut a thin Wedi strip to fill this channel, bonding it in place. This step locks your niche to the shower pan below, completing your waterproof shell.
Recommended Products

100% Waterproof: This 100% silicone formula offers ultimate protection against water damage, providing a reliable seal in areas prone to consistent water exposure

Waterproof sealant: This clear caulk seals out air, water, and moisture with 100% silicone as cured

Waterproof: Multipurpose clear silicone sealant creates a permanent waterproof, protective seal that is ideal for metal, glass, rubber, tile and porcelain
Seat and Fasten the Niche With Construction Adhesive
Why risk a loose niche when construction adhesive locks it down tight? You need a solid, sealed bond before waterproofing begins, and seating niche correctly prevents future headaches.
Follow this sequence:
- Apply a bead of construction adhesive along the bottom of your shower niche opening. This secures the base and blocks water intrusion.
- Run adhesive on the back flange. Keep it 1/2 inch from the outer edge; this creates your continuous seal.
- Skip the sides and top completely. Focus only where contact actually happens for proper seating niche integrity.
- Wipe excess immediately after installation, then optionally add a thin top bead for extra leak protection.
Your shower niche is now locked in place. Construction adhesive has done its job, and you are ready for the next phase.
Recommended Products

Outer Dimensions: 16" x 16"
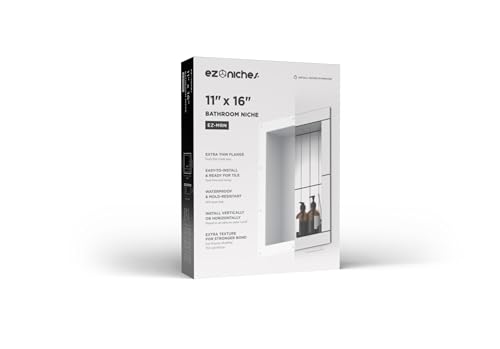
Saves time and money compared to traditional niche construction methods

Corner Support: engineered specifically as robust corner brackets for floating shower bench corner brackets installations; Our 16" L x 2" W x 2" H concealed corner bracket provides exceptional hidden support, transforming your bathroom corner into a secure, space-saving seating area ideal for showers or vanity use
Waterproof Every Joint Before Tiling Begins
Your niche is locked in place, but you’re not ready for tile yet. Proper waterproofing seals every seam, and this step determines whether your niche installation lasts.
Start by applying a continuous bead of joint sealant around the niche perimeter, covering all edges completely. Next, embed waterproofing membrane tape into thinset mortar across every seam, pressing firmly to eliminate air pockets. This creates a watertight barrier that stops moisture from sneaking behind your tile work.
Apply dedicated sealant at shelf edges and internal corners, areas where water pools most. Check the base, sides, and top for gaps; you’re looking for full, unbroken coverage. Re-inspect after the final sealant application cures.
This tile preparation step isn’t optional. Skip it, and you’ll face mold, rot, and costly repairs behind your beautiful finish.
Recommended Products

Complete Waterproofing Kit: This waterproofing seal kit includes 6 inside waterproofing membranes and 4 outside waterproofing corner membranes, delivering reliable waterproof performance for your bathroom requirements

All-in-One Waterproof Corner Set : You will receive 8 inside corner shower membranes, 4 outside corner shower membranes and 2 plastic putty knife. Soft, elastic and fully waterproof, this set is a great choice for showers, shower benches and bathtubs.
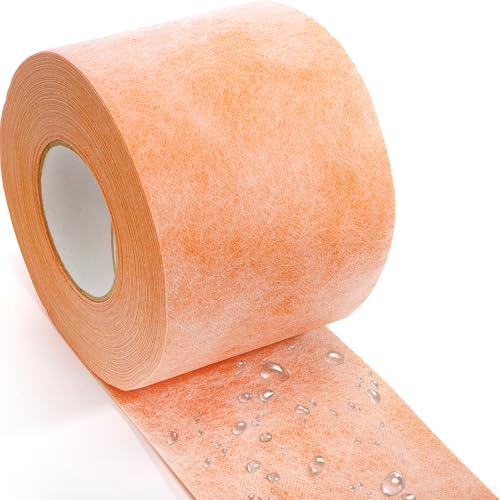
Material: Our waterproof membrane band rolls are made of quality polyethylene, it has stronger waterproof and anti-seepage capabilities, high quality materials ensure that our products have extremely high wear resistance, tear resistance and flexibility
Tile, Grout, and Caulk Your Niche to Completion
You’ll start with a smart tile layout strategy, working from the niche back outward so your grout lines flow seamlessly into the surrounding wall.
After a full 24-hour dry time, you’ll grout everything thoroughly, hitting corners hard with pre-sealed grout to cut down on future maintenance. Finish by running color-matched silicone caulk along every seam and shelf edge, then seal those soft, porous tiles once more for a barrier that actually holds water out.
Recommended Products

Long-Term Coverage - Backed by a 10-year limited warranty against manufacturing defects when installed per the Schluter Installation Handbook and Technical Data Sheet, following all guidelines and industry standards in effect at the time.

Waterproof Design - Delivers full moisture protection through a tough, vapor-tight construction, ensuring a worry-free bathroom environment.

Seamless Fit - Designed for compatibility with the Schluter-Shower System, ensuring enhanced waterproofing and reliability in shower construction.
Tile Layout Strategy
A smart tile layout keeps your niche from looking like an afterthought. You need to plan your shower niche tile layout so grout lines inside align with wall grout lines, creating a cohesive, intentional appearance.
Here’s your strategy:
- Map grout lines from the wall into the niche before cutting any tile.
- Tile the back wall first, then shelves and sides, keeping joints consistent.
- Select matching grout and pre-sealed grout to cut sealing frequency and lock in waterproofing.
- Wait 24 hours for tile to dry, then seal porous tile surfaces before grouting.
After installation, you’ll apply silicone sealant around the perimeter and shelf edges for a watertight finish. This approach protects your work and maintains the visual flow you’ve established between wall and shower niche.
Grouting Best Practices
Grout selection closes the gap between your tile work and long-term performance. You need to let tile dry 24 hours before grouting, no exceptions, so adhesion stays strong and lines stay true.
Choose pre-sealed grout to cut down on sealing frequency. For wet niches and corners, upgrade to epoxy grout, Mapei Flexcolor CQ, which shrugs off stains and moisture without extra fuss. Spread grout across walls and the niche thoroughly, packing corners and seams tight, because gaps invite water intrusion and compromise waterproofing.
After grouting cures, seal porous tile surfaces with a suitable sealer. Soft stone especially needs this backup protection. Skip sealing if your tile is dense porcelain; you’re covered already.
Match silicone caulk color to your grout before applying to niche seams and shelf edges. This creates a watertight seal that blends visually and locks out moisture where grout alone won’t hold.
Caulking for Waterproofing
The niche sits in place, but it’s only as watertight as the seal you build now. You’ve tiled and grouted, so now you’ll lock in waterproofing with caulk. Here’s how to seal your shower niche right:
- Run silicone caulk along every seam, corner, and shelf edge inside the niche.
- Match your caulk color to the grout for a clean, finished look.
- Wipe away excess sealant with a damp finger or tool before it skins over.
- Add a thin bead along the top flange, where water hits first.
Check your work after 24 hours. Touch up any gaps.
Good waterproofing isn’t flashy. It’s the difference between a niche that lasts years and one that rots your wall. You don’t want that.