


Are you tired of your worn-out floors but don’t want to break the bank on a complete renovation? You’re not alone! Many people crave a fresh look for their homes without the hefty price tag. That’s why I created this post on stenciled floors, a fantastic, budget-friendly option that can breathe new life into your space. With just a bit of creativity and a few materials, you can transform your floors into eye-catching works of art.
If you’re someone who loves DIY projects or simply wants to add a personal touch to your home decor, this guide is for you. Whether you live in a small apartment or a cozy house, these stenciled floor ideas will inspire you to take on a fun project that not only enhances the aesthetics of your space but also suits your budget. You’ll find a variety of styles, from bold geometric patterns to playful polka dots, perfect for any small area in your home.
In this post, you’ll discover 17 unique stenciled floor ideas that are both creative and affordable. Each idea comes with tips on materials and techniques, making it simple for you to achieve a stunning look without professional help. Get ready to roll up your sleeves and dive into the wonderful world of stenciled flooring!
Key Takeaways
– Stenciled floors are a cost-effective way to refresh your home decor without a full renovation.
– The guide features 17 creative stenciled floor ideas, perfect for small spaces and various styles.
– You’ll learn about different stenciling techniques that make each design achievable for DIY enthusiasts.
– Practical tips on materials and processes will help you tackle your floor makeover with confidence.
– Personalizing your flooring with stencils allows you to express your creativity while sticking to a budget.
Recommended Products

REUSABLE STENCIL ONLY – Includes 12 reusable geometric stencils in 6x6 inches, translucent white color, made from flexible durable material for painting on wood, wall, furniture, floor, tile, canvas and fabric; easy to use with paint brushes, sponge applicators or spray paint tools

Oversized 12”x16” Layout for Fast Large-Surface Painting - This extra big 12 x 16 inch geometric line stencil covers more area per pass, drastically cutting down DIY project time compared to small mini stencils. The balanced four-quadrant vertical/horizontal line grid pattern creates a seamless repeating block design for full-wall, full-floor, and large surface coverage without messy misalignment gaps.
Contents
- 1. Bold Geometric Patterns
- 2. Floral Fantasy
- 3. Rustic Wood Grain
- 4. Fun and Funky Chevron
- 5. Nautical Inspired
- 6. Vintage Charm with Damask
- 7. Playful Polka Dots
- 8. Chic Herringbone
- 9. Abstract Artistry
- 10. Timeless Checkered Floors
- 11. Contemporary Stripes
- 12. Artistic Mosaic
- 13. Whimsical Animal Prints
- 14. Classic Lines
- 15. Elegant Lace Patterns
- 16. Charming Patchwork
- 17. Stylish Ombre Effects
Recommended Products

Package Comes with: you will receive 1 piece reusable painting stencil, which is A4 size 8.3 x 11.7 inches / 21 x 29.7 cm

Flower Damask Template: You will get a painting template with daily theme and the size about 11.8x11.8 inches/30x30cm. The template is printed with flower brocade patterns, which are arranged in a symmetrical way. The overall pattern looks vivid and beautiful, and is very suitable for home decoration.

Reusable Design: Made for multiple uses—clean and reuse on different projects without waste.
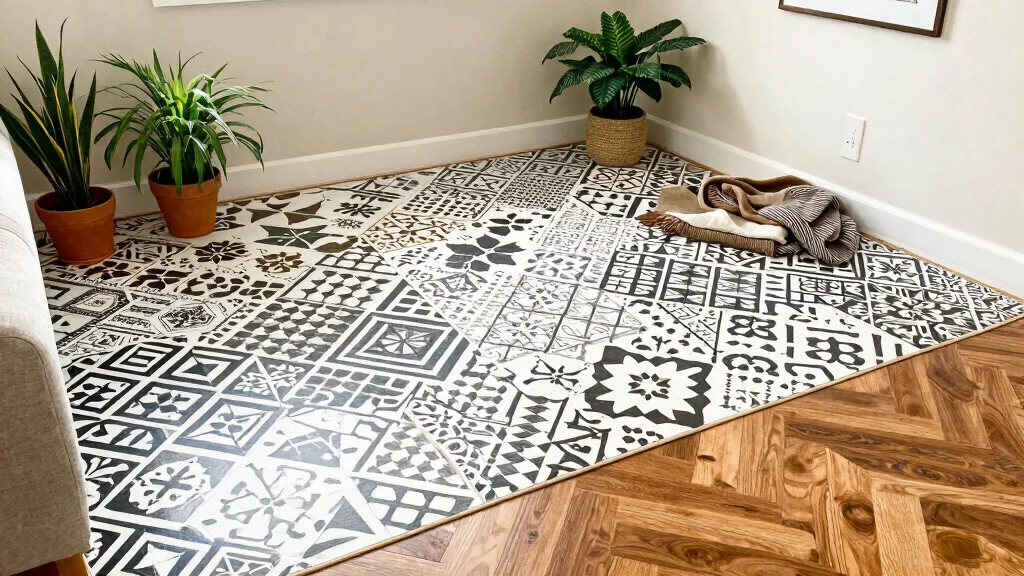
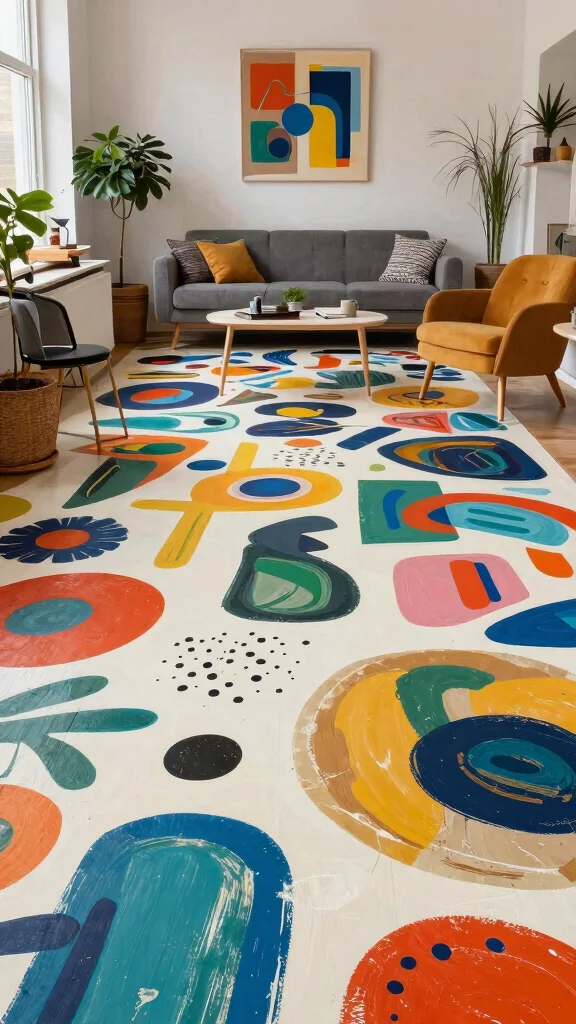
1. Bold Geometric Patterns
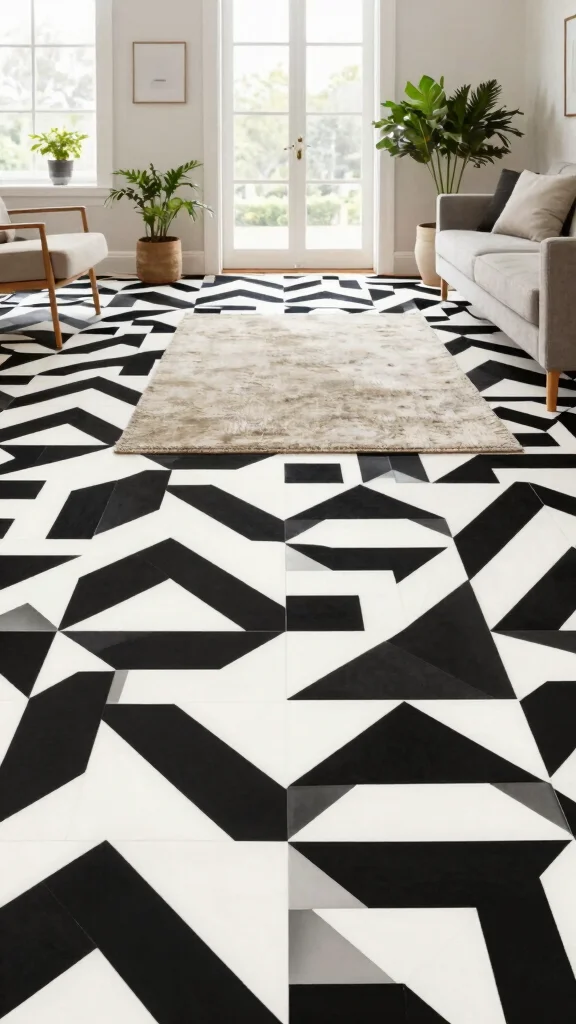
Bold geometric patterns can transform your floors into striking focal points that capture attention and elevate your space. Their clean lines and sharp angles create a sense of visual harmony, perfect for those wanting a modern aesthetic. You might consider pairing shades of deep navy and crisp white for a classic look or experiment with bright, playful colors for a more energetic vibe. These designs shine in various settings, from chic living rooms to stylish entryways, making a strong impression wherever they are placed.
To implement these patterns effectively, start by using painter’s tape to outline your shapes, ensuring clean edges and minimal mess. You can easily find affordable stencil kits online or at craft stores, making this project budget-friendly. Embracing geometric patterns can also align with current trends emphasizing bold statements and artistic expression.
Consider these tips to make the most of your geometric designs:
– Pair contrasting colors for maximum impact.
– Install stencils on a smooth, clean surface for best results.
– Use a foam roller for a flawless application.
By exploring geometric patterns, you’re adding a layer of sophistication and creativity to your home that’s both daring and delightful.
Recommended Products

Package contains 1 piece Large Hexagon Wall Stencil, 16x24 Inch.

LARGE HERRINGBONE WALL STENCIL: Package contains a decorative herringbone stencil measuring 12x12 inches. Great for your DIY household projects

EXTRA LARGE STENCIL - You can finish your project with our extra large stencil quickly and save time.
2. Floral Fantasy
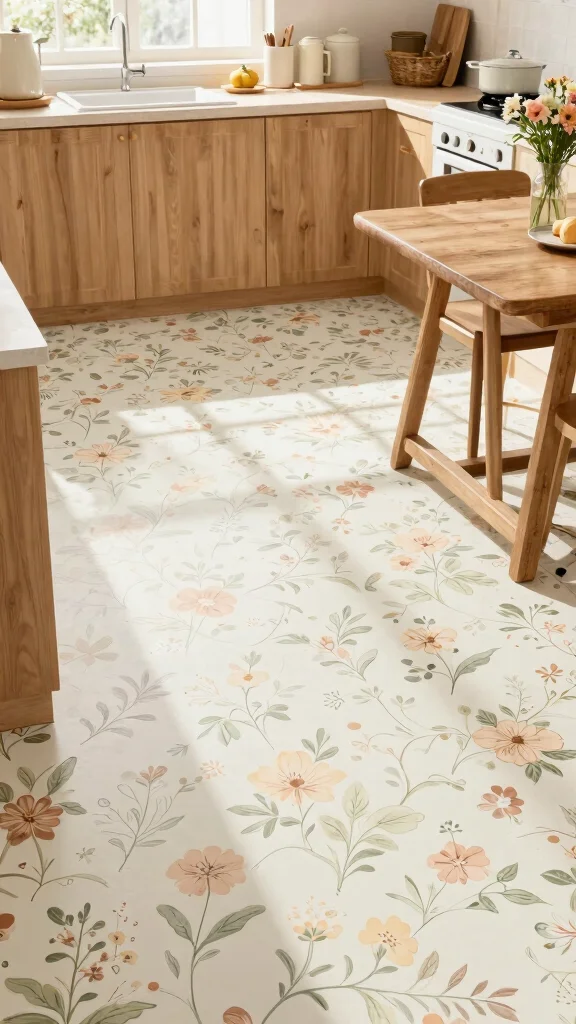
Floral stencil designs can breathe life into your floors, infusing spaces with vibrant colors and a touch of nature’s beauty. These cheerful patterns evoke feelings of warmth and joy, perfect for kitchens, sunrooms, or entryways where you want to create a welcoming atmosphere. Choose soft pastel tones for a serene vibe or opt for bold, bright blooms to make a striking statement. Floral designs can also add a vintage charm, especially when paired with distressed finishes for a cozy, inviting feel.
For a successful application, use a small stencil brush to navigate detailed areas and consider blending colors to achieve a painterly effect. Floral stencils are widely available, and you can find budget-friendly options at craft stores. This approach not only adds beauty but also connects you to broader trends celebrating nature and personal expression in home decor.
Explore these implementation ideas:
– Pair floral designs with neutral furnishings for a balanced look.
– Layer rugs over the stenciled surface for added texture.
– Seal your work with a clear coat to protect your art.
Embrace the beauty of floral stencils, creating a warm environment that invites relaxation and happiness into your home.
Recommended Products

Product description: 4PCS Dots stencils, easily meet your various DIY painting needs.

What You Will Get: You will receive 4 pieces dots stencils in different size.

VERY LARGE WALL PAINTING STENCILS: A great and economical alternative to wallpaper. A wide selection of designs ideal for large areas. Traditional paints or striking decorative plasters and emulsions? Choose the best technique and pattern and make a unique interior metamorphosis yourself!
How To Choose the Right Stenciled Floor Design
1. Define Your Style
Before you start selecting a stencil, think about the overall aesthetic you want to create. Are you drawn to modern geometric patterns or rustic wood grains? Consider how the design will complement your existing decor. For instance, if your space feels cozy with warm colors, a floral stencil might add charm. On the other hand, if you have a minimalist vibe, go for sleek lines or abstract shapes.
2. Consider Your Space
Small spaces can benefit from lighter colors and simple patterns to avoid feeling cramped. If you’re working with a larger area, you can experiment with bold designs. Measure your floor space to see how much stencil area you’ll need. A large pattern might overwhelm a small room, so opt for smaller motifs to maintain balance.
3. Think About Maintenance
Some stenciled floors may require more upkeep than others. If you’re stenciling a floor in a high-traffic area, choose a durable paint that can withstand wear. Consider using outdoor paint for extra resilience, as it often has a tougher finish. Easy-to-clean designs are ideal for kitchens or entryways where spills are common.
4. Color Palette
Your color choices can dramatically affect the look of your stenciled floor. Light colors can make a small space feel larger, while darker hues can create a cozy atmosphere. Think about the colors you already have in your home. Select a palette that ties everything together. You can use a color wheel to find complementary shades that enhance your overall decor.
5. Test Before You Commit
Always test your chosen stencil on a small, inconspicuous area of the floor first. This will let you see how the paint looks in your space and allow you to confirm that the color and design work for you. A quick brush or roller application can give you a good preview before you dive into the full project.
6. Set a Budget
Stenciling can be an affordable way to refresh your floors, but keep an eye on costs. Paint, stencils, and other supplies can add up. Create a budget that allows for a couple of practice runs. You might also want to account for additional items like sealants or protective coatings to extend the life of your project.
Pro Tip: Use painter’s tape to outline your stencil area before you paint. This not only helps ensure clean lines but also gives you a clear visual on how the pattern will look on your floor. It’s a simple trick that can save you time and frustration during the actual painting process!
By following these selection criteria, you can confidently choose the right stenciled floor design that enhances your space without breaking the bank. Whether you go for a bold geometric pattern or a charming floral fantasy, the right choice can truly transform your home.
Recommended Products

Package includes: 8 pieces of different geometric stencils in large size (12 x 12 inches) creative template for craft, painting and home decor; Larger tiles are suitable for the stenciled floors, and also will look nice on a wall too

🎨 【6-Piece Geometric Stencil Set】: Package includes 8 reusable geometric painting templates 11 x 7 inches(18 x 28 cm). Perfect size for wall stenciling, floor patterns, furniture, canvas, and DIY home decor. Create stunning repeat patterns easily!

16 Unique Artistic Patterns & 6x6 Inch Perfect Size:This reusable stencils set includes 16 curated mixed media designs,featuring cubist,brick,marble,tie-dye,burlap,bubbles,wood grain,and geometric textures—offering diverse creative options for custom crafts.Each stencil measures 6x6 inches,compact yet versatile enough for painting on walls,wood,floors,tiles,canvas,furniture,and paper,fitting both large-scale decor and small DIY projects like card making
3. Rustic Wood Grain
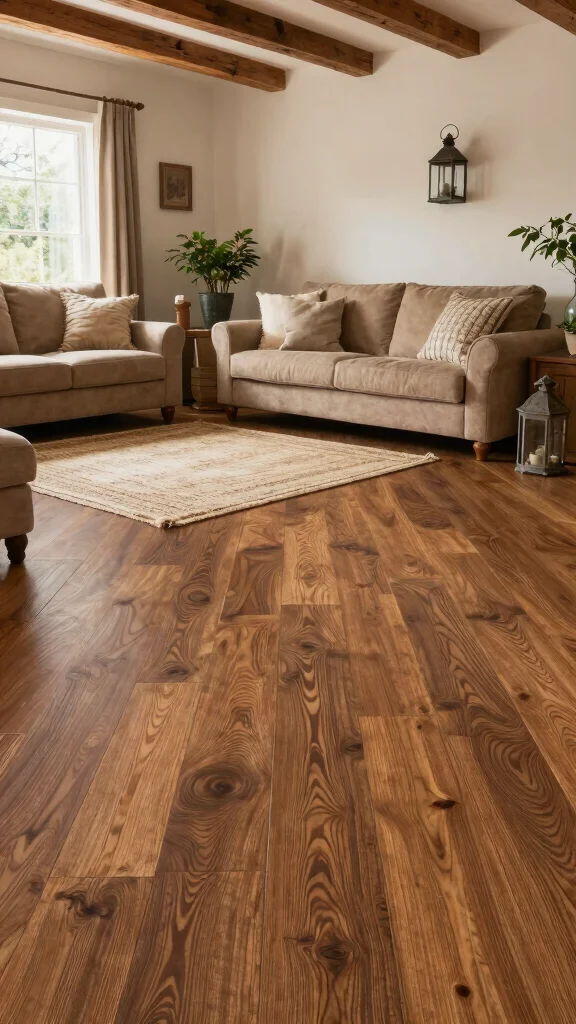
Achieving the rustic charm of wood flooring is attainable with stenciled wood grain designs, offering an authentic look without the high cost of real wood. This technique allows you to create a warm and inviting atmosphere, making it ideal for cozy living areas or kitchens. Opt for rich browns or grays that mimic traditional wood tones, and vary your paint layers for depth and dimension. This method not only enhances the aesthetic but also allows you to enjoy the charm of wood without the maintenance.
To create the perfect wood grain look, utilize a sponge for texture when applying the base coat, then stencil over it to achieve a realistic finish. You can source stencils online or even create your own for a personalized touch. This design choice connects with broader trends highlighting natural materials and cozy interiors.
Try these tips to maximize your rustic wood grain effect:
– Ideal for both living rooms and kitchens.
– Pair with farmhouse decor for a cohesive theme.
– Finish with a matte sealer to enhance natural beauty.
Let your floors tell a story of warmth and character, inviting guests into your cozy retreat.
Recommended Products

WALL STENCIL:Package contains 1 piece Large Damask Wall Stencil - 12x16Inch. Material:Translucence 10mil Mylar PET.

WALL STENCIL:Package contains 1 piece Large Damask Wall Stencil - 12x16Inch. Material:Translucence 10mil Mylar PET.
WALL STENCIL:Package contains 1 piece Large Damask Wall Stencil - 16x21Inch. Material:Translucence 10mil Mylar PET.
4. Fun and Funky Chevron
The chevron pattern is an exciting way to add a dynamic touch to your floors, creating movement and energy in your space. Its zig-zag design can suit various styles, from modern chic to playful eclectic, depending on your chosen color palette. This pattern is particularly effective in narrow hallways or small rooms, where it can create an illusion of depth and length. A bold chevron design can energize any area, making it feel alive and inviting.
To personalize your chevron pattern, alternate colors within the design, whether you stick to classic black and white or opt for vibrant jewel tones. This project is accessible even for beginners, as many stencil kits are available at craft stores. Embracing chevron aligns with current trends that favor bold, graphic designs that make a statement.
Consider these tips for your chevron project:
– Pair with playful decor for vibrancy.
– Ideal for entryways, bathrooms, and kitchens.
– Seal with a gloss finish for a polished look.
Elevate your floors with a chevron design that injects fun and flair into your home!
Fun fact: A bold chevron pattern can visually lengthen a narrow hallway by up to 15%. Pair it with a light background to keep your stenciled floor feeling airy and lively.
Recommended Products

FLOOR & WALL STENCILS FOR PAINTING LARGE PATTERN: Our herringbone stencil set includes two identical wall stencils for painting on wood, paper, concrete, metal & more! Measuring 13" in length x 18" in height, these are huge stencils for walls that can also be used for a variety of different projects. Create seamless herringbone stencil floor patterns across any surface. They even make great concrete stencils for patio floor designs!
VERY LARGE WALL PAINTING STENCILS: A great and economical alternative to wallpaper. A wide selection of designs ideal for large areas. Traditional paints or striking decorative plasters and emulsions? Choose the best technique and pattern and make a unique interior metamorphosis yourself!

Package content: you will receive 8 pieces of geometric shape wall decorations, each style has different patterns, you can choose different one according to your own decoration style, and decorate your own room by yourself
5. Nautical Inspired
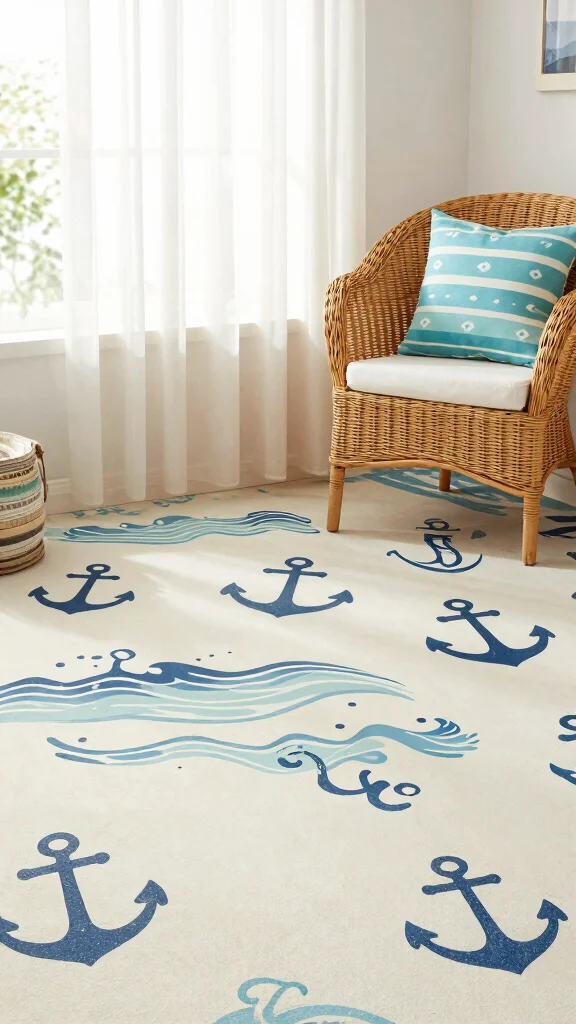
Bring the refreshing vibes of the ocean into your home with a nautical-themed stenciled floor. Imagine ocean waves, anchors, and starfish painted in soothing sea tones, creating a tranquil retreat in your space. This theme is particularly well-suited for bathrooms or sunrooms, where the coastal feel can truly shine. Opt for light base colors like sandy beige or pale blue and use darker shades for stencils to create lovely contrasts that evoke beachside serenity.
To achieve this look, consider using a mix of stencils to create a cohesive nautical theme. Sourcing marine colors and stencils is easy, making this a budget-friendly decorating option. This design connects beautifully with broader decor trends that celebrate the coast and natural elements.
Explore these tips for your nautical design:
– Ideal for beach houses or coastal-themed spaces.
– Use marine colors to emphasize the theme.
– A matte finish completes the oceanic look perfectly.
Transform your floors into a seaside escape with creative designs that soothe the spirit and invite relaxation.
Recommended Products

SAVE TIME AND MONEY - Why spend long hours and $$$ on a variety of Home Decor stuff? Our Reusable stencils are affordable and enables you to make DIY Masterpieces quickly and efficiently in just minutes, offering you more free time!

SAVE TIME AND MONEY - Why spend long hours and $$$ on a variety of Home Decor stuff? Our Reusable stencils are affordable and enables you to make DIY Masterpieces quickly and efficiently in just minutes, offering you more free time!

Package Comes with: you will receive 1 piece reusable painting stencil, which is A4 size 8.3 x 11.7 inches / 21 x 29.7 cm
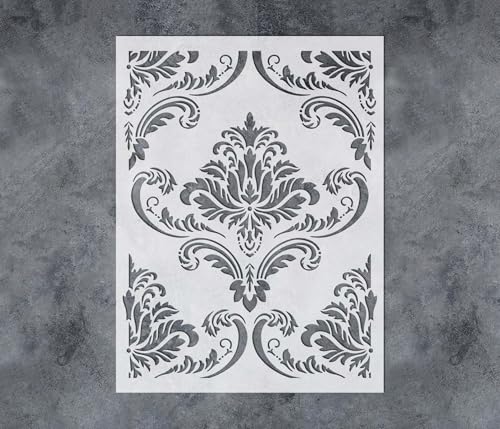
6. Vintage Charm with Damask
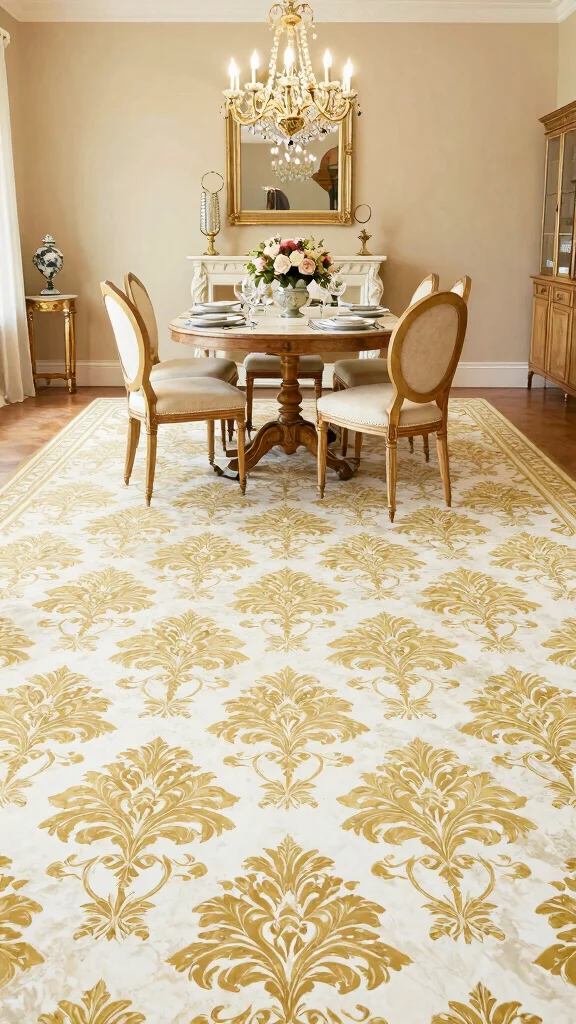
For those who appreciate timeless elegance, a damask stencil can add sophistication to your floors. This intricate pattern enhances the vintage aesthetic, making it ideal for dining rooms or bedrooms where a refined touch is desired. Soft colors or metallic finishes can elevate the look, allowing the floor to be the focal point of the room. Keeping furniture understated allows this beautiful design to truly shine, creating an inviting atmosphere.
For best results, apply the stencil with a sponge brush to achieve fine detail and depth. You can find damask stencils in various designs, making this project accessible and affordable. This pattern is perfect for connecting with current trends that emphasize classic elegance and intricate details.
Consider these tips for your damask project:
– Perfectly paired with vintage or antique furnishings.
– Works beautifully in small dining areas or formal spaces.
– Seal with a satin finish for a refined appearance.
Elevate your decor with a damask design that whispers elegance and sophistication throughout your home!
Recommended Products

🎨 【6-Piece Geometric Stencil Set】: Package includes 8 reusable geometric painting templates 11 x 7 inches(18 x 28 cm). Perfect size for wall stenciling, floor patterns, furniture, canvas, and DIY home decor. Create stunning repeat patterns easily!
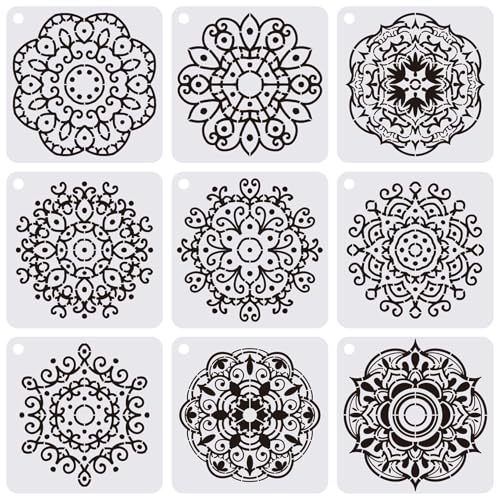
Professional Home Decor Tool: This set of 9 distinct geometric mandala templates is designed for high-end DIY home improvement. Perfect for adding artistic accents to wooden furniture, floors, wall borders, cabinets, and tiles
7. Playful Polka Dots

Nothing captures a sense of fun quite like polka dots! This whimsical stencil design can brighten any space, especially children’s rooms or play areas. You can choose contrasting colors for a vibrant pop or complementary shades for a more cohesive look across your floor. These playful patterns invite joy and creativity, making them perfect for casual environments where laughter is encouraged.
For added interest, consider varying the sizes of your dots to create visual charm. This design is easy to execute, as many stencil options are available at craft stores. Using non-toxic paint ensures safety, especially in areas meant for kids, aligning with current trends that prioritize fun and functionality.
Explore these tips for your polka dot design:
– Ideal for playful and casual areas.
– Use non-toxic paint for spaces frequented by children.
– Finish with a durable clear coat for easy maintenance.
Create a vibrant atmosphere that invites joy and creativity with delightful polka dots on your floors!
Fun fact: A stenciled floor using polka dots can brighten a room by up to 20% and visually expand a small space by about 15%. For a budget-friendly makeover, vary dot sizes to add charm and playful energy.
Recommended Products
WALL STENCIL: Package contains 1 piece Large Damask Wall Stencil - 16x21Inch. Material: Translucence 10mil Mylar PET.
WALL STENCIL:Package contains 1 piece Large Damask Wall Stencil - 12x16Inch. Material:Translucence 10mil Mylar PET.
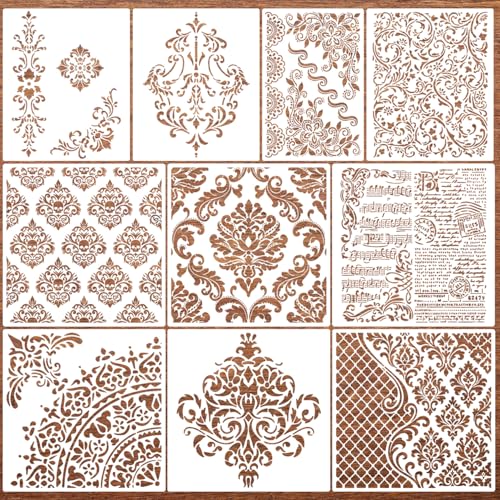
Package Includes:10pcs damask stencils for painting walls, includes 6pcs measuring 11.8x11.8inches,3pcs measuring 11.8x10inches, 1pc measuring 11.8x8 inches.
You might also like
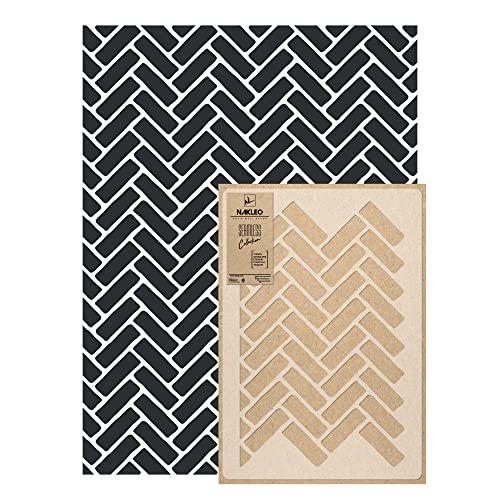
8. Chic Herringbone
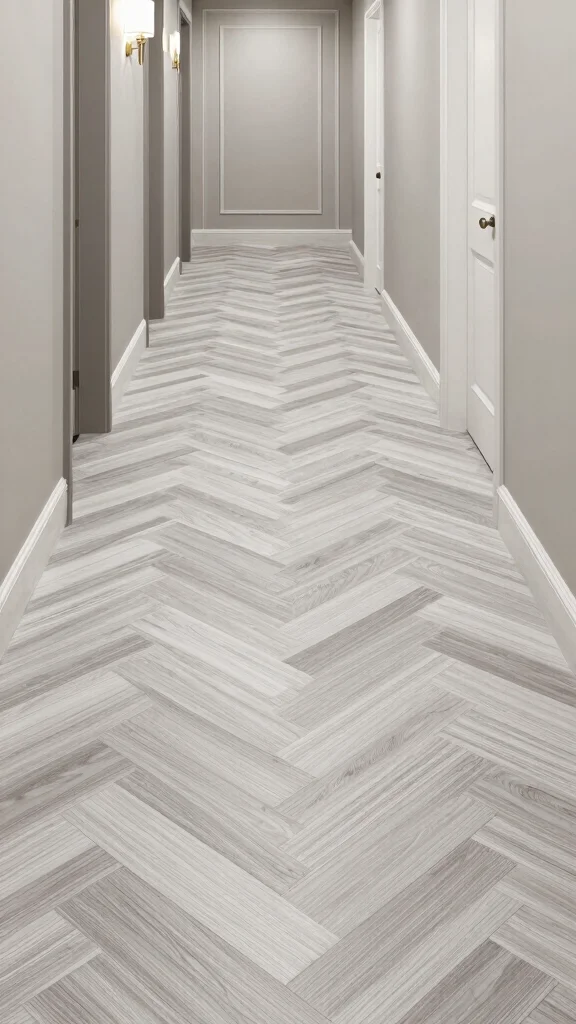
The herringbone pattern is a sophisticated choice for stenciled floors, offering an upscale look without the expense of real wood. This intricate design works beautifully in living rooms or hallways, adding elegance to any space. Opt for neutral tones for a classic feel or select bold colors to make a striking statement. The herringbone layout can visually enhance your area, creating a sense of movement and flow that captivates.
To achieve this look, consider stenciling on a clean, smooth surface for the best results. Herringbone patterns align with current trends favoring classic designs that exude timeless elegance. This is an accessible project, with stencil kits available at various price points.
Try these tips for your herringbone design:
– Great for defining spaces in open-concept areas.
– Easy to clean and maintain when sealed correctly.
– Pair with classic decor for a seamless integration.
Enhance your home with timeless elegance through a stunning herringbone design that gracefully interacts with your decor!
9. Abstract Artistry
Unleash your imagination with abstract stenciled designs that allow for playful experimentation with colors and shapes! Abstract patterns can elevate your space, adding personality and flair while maintaining a contemporary vibe. This creative approach encourages you to express your individuality through your floors, making them a unique art piece that reflects your style.
To achieve a layered look, use multiple colors and techniques, blending them artfully for a stunning finish. Abstract stencils are widely available, and you can even create your own custom designs, making this project accessible and fun. This aligns beautifully with current trends that celebrate personal expression and creativity in home decor.
Consider these tips for your abstract project:
– Perfect for contemporary spaces where individuality shines.
– Mix designs for a dynamic effect.
– Remember to use a sealer to protect your artistic work.
Transform your floors into a canvas that showcases your artistic side, inviting creativity and boldness into your home!
10. Timeless Checkered Floors
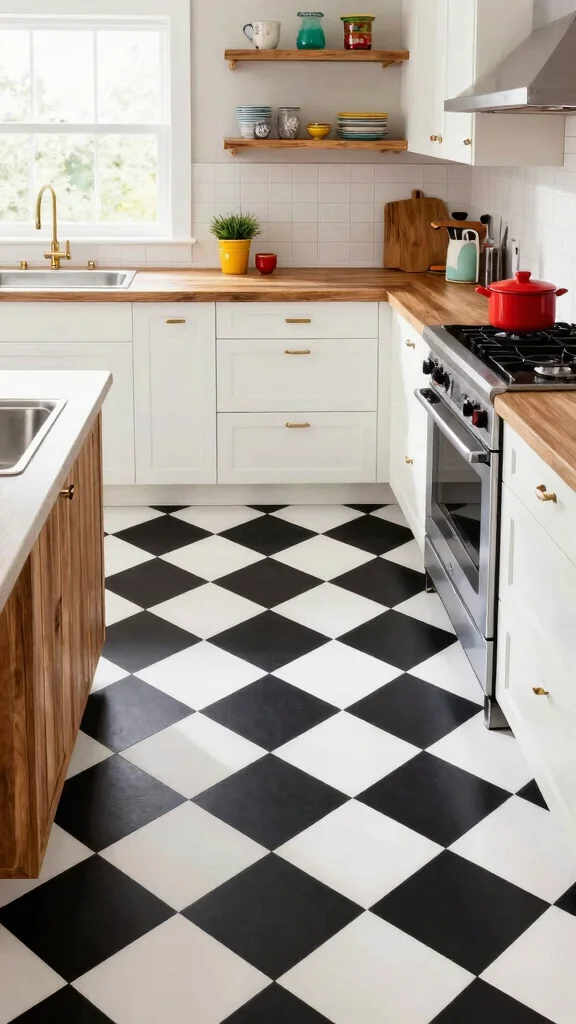
The checkered pattern is a classic flooring choice that blends fun and sophistication seamlessly. It suits a range of styles, from retro to contemporary, making it incredibly versatile. You can choose contrasting colors like traditional black and white for a bold look or experiment with softer hues for a modern twist. This pattern can add a playful yet elegant touch to kitchens, dining rooms, or entryways.
For a successful implementation, consider using larger squares for dramatic impact in spacious areas or smaller ones for intricate designs in cozier spots. Checkered designs are widely available, making it easy to find stencils that fit your vision. This approach connects well with current trends favoring timeless styles that remain enduringly popular.
Explore these tips for your checkered design:
– Ideal for kitchens, dining rooms, or entryways.
– Great for creating a cheerful atmosphere.
– Seal your design for added durability and shine.
Add a checkered pattern to your floors for a charming twist that enhances your home with timeless appeal!
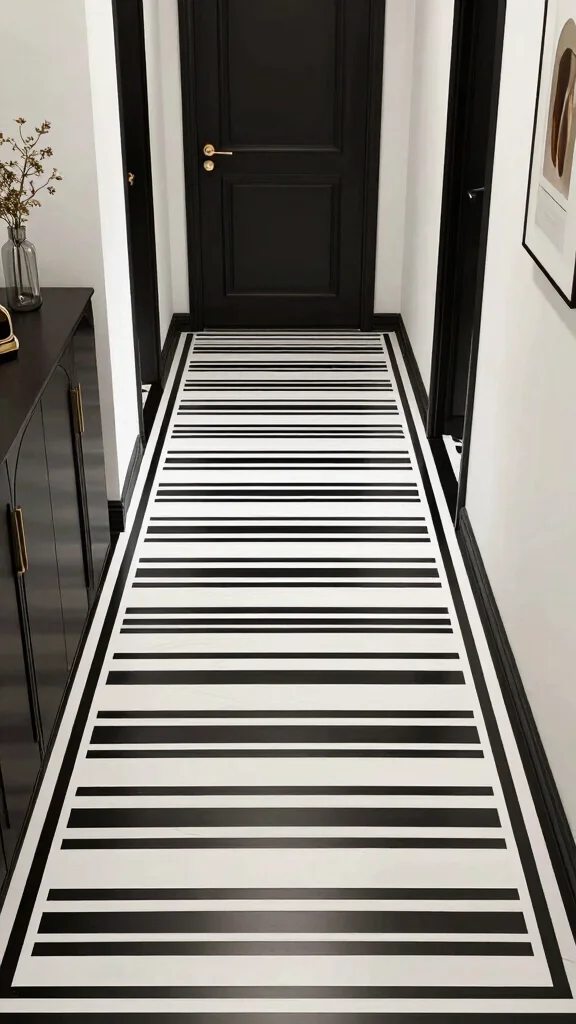
11. Contemporary Stripes
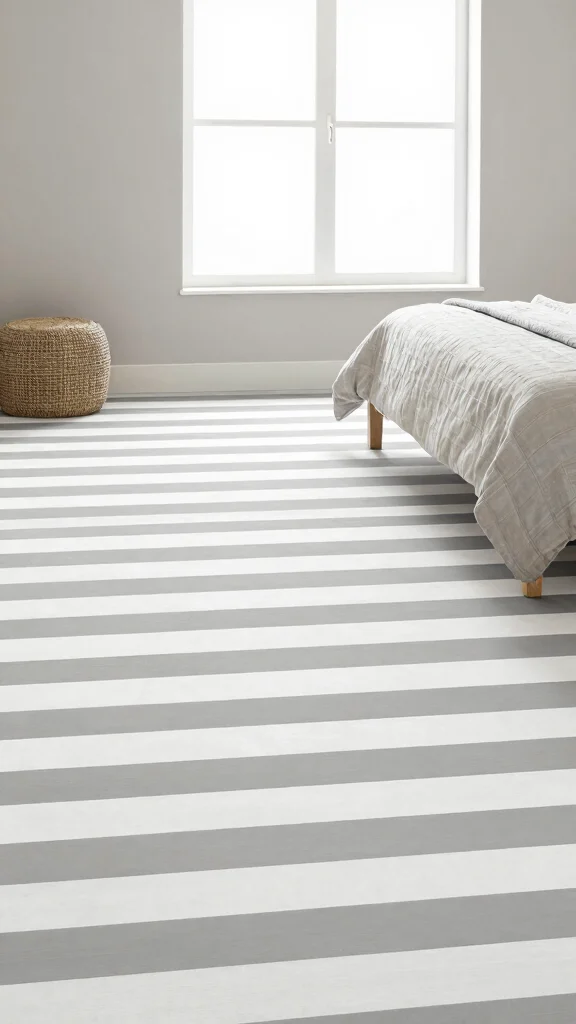
Stripes serve as a versatile stencil option that can dramatically alter the perception of a room, adding length and dimension effortlessly. Whether you opt for vertical or horizontal stripes, they can enhance the feeling of space significantly. Vertical stripes can make low ceilings appear higher, while horizontal ones can broaden narrow rooms, making them feel more open and welcoming.
For a striking effect, choose bold colors for a statement or soft shades for understated elegance. This project is straightforward, especially with painter’s tape for clean lines. Stripes are currently trending, emphasizing modern aesthetics that reflect personal style and sophistication.
Consider these tips for your striped design:
– Perfect for modern and minimalist spaces.
– Use painter’s tape for precision in your lines.
– Seal your design for longevity and durability.
Transform your floors into a trendy feature with chic stripes that reflect your unique taste and elevate your home!
12. Artistic Mosaic
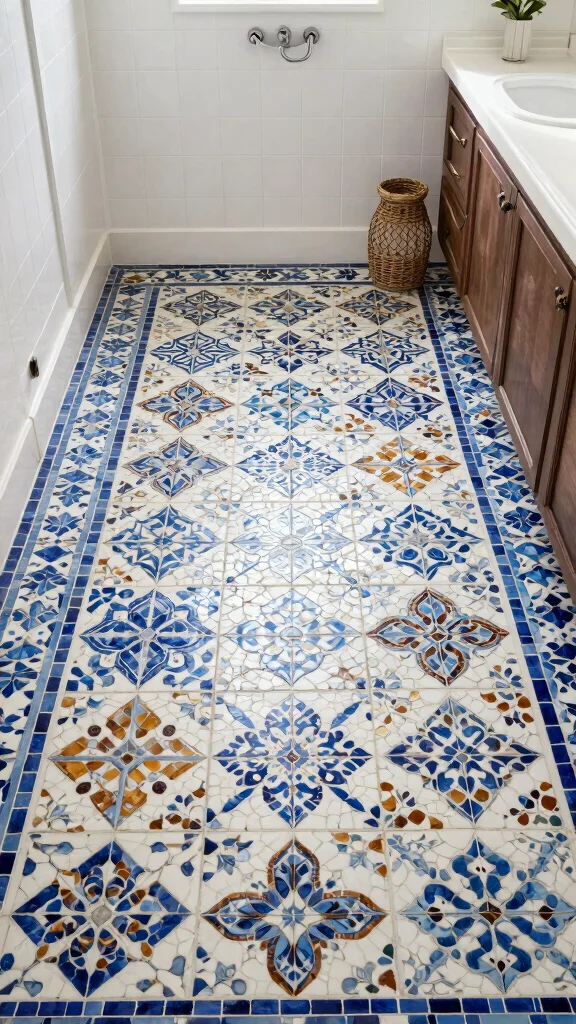
Bring the enchanting charm of mosaic floors into your home with stenciled designs that mimic intricate tile work. Mosaic patterns can add a vintage or artistic touch to small spaces, elevating them and making them feel special. You can choose a diverse color palette that reflects your personality or stick to a monochromatic scheme for a classic, timeless look.
To achieve detailed designs, use small stencils and pay close attention to color placement for a cohesive finish. This project is both fun and accessible, with plenty of stencil options available at craft stores. Mosaic designs align beautifully with current trends celebrating craftsmanship and artistic expression.
Consider these tips for your mosaic project:
– Ideal for bathrooms or areas where you want to make a statement.
– Easy to maintain when sealed properly.
– Pair with simple decor for a balanced aesthetic.
Create a unique flooring masterpiece that adds character and charm to your home, inviting admiration and warmth!
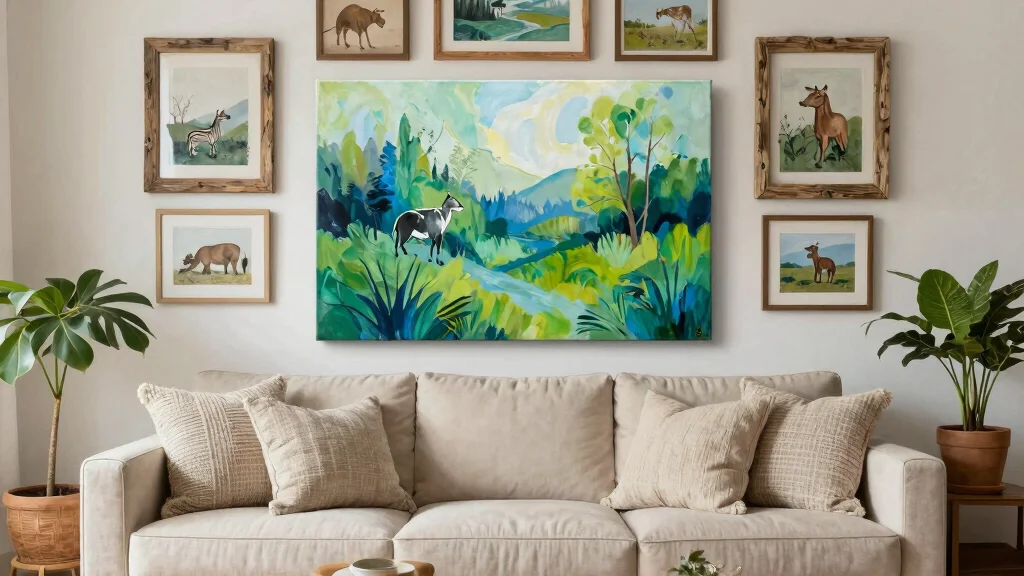
13. Whimsical Animal Prints
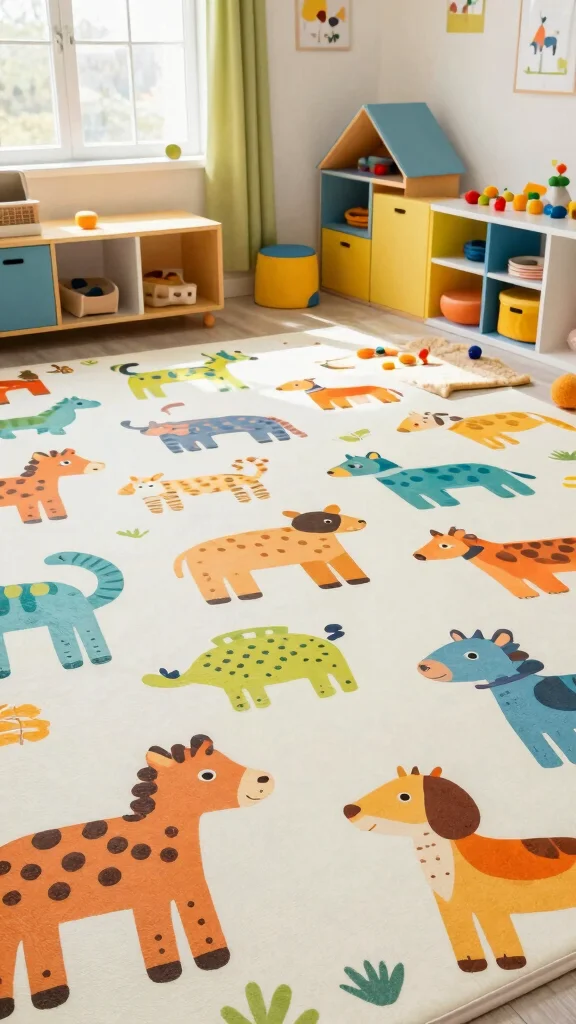
For a playful and quirky twist, consider stenciling animal prints on your floors! This fun design works excellently in children’s rooms, play areas, or any space where whimsy is welcomed. Bold colors can create a lively atmosphere, while more muted tones can offer subtle charm, making this design versatile for various settings.
To achieve an eclectic look, mix different animal stencils for a dynamic effect. This project is ideal for anyone looking to inject a sense of joy and creativity into their home. Using non-toxic paint ensures safety, especially in spaces frequented by children, aligning with current trends that prioritize fun and functionality.
Explore these tips for your animal print project:
– Perfect for playful environments.
– Non-toxic paint is recommended for safety and peace of mind.
– Finish with a protective clear coat to withstand wear.
Unleash your wild side and add a playful element that children and adults alike will adore!
14. Classic Lines
Straight lines are a simple yet effective method to introduce sophistication to your floors. A linear stencil design can create a sleek, modern look that’s both easy to achieve and visually appealing. By varying line thicknesses and colors, you can add interest and dimension, making your flooring a statement piece.
Horizontal lines can create a sense of width, while vertical lines enhance height, making them ideal for various spaces. This project is straightforward and accessible, connecting beautifully with trends that celebrate minimalism and contemporary design. Sealing your lines ensures durability and longevity, enhancing your design’s beauty.
Consider these tips for your linear design:
– Ideal for minimalist or contemporary decor styles.
– Great for small spaces when used wisely.
– Seal to ensure the design lasts beautifully.
Simplicity can be stunning – elevate your home with classic lines that never go out of style!
15. Elegant Lace Patterns

Lace stencil designs can introduce a touch of femininity and elegance to your floors. This intricate pattern is perfect for areas like dining rooms or bedrooms, where a softer ambiance is desired. Opt for subtle colors or pastels to create a delicate feel, evoking a romantic atmosphere in your home.
To maintain the lace’s delicate appearance, use a small brush for detailed work when applying the stencil. You can find a variety of lace stencils at craft stores, making this project accessible to all. This design aligns beautifully with current trends emphasizing vintage aesthetics and intricate details that enhance your space.
Explore these tips for your lace project:
– Great for adding vintage charm to your spaces.
– Pair with soft furnishings for a cohesive look.
– Seal for durability while keeping an elegant finish.
Transform your floors into a canvas of elegance with enchanting lace patterns that exude charm and sophistication!
16. Charming Patchwork
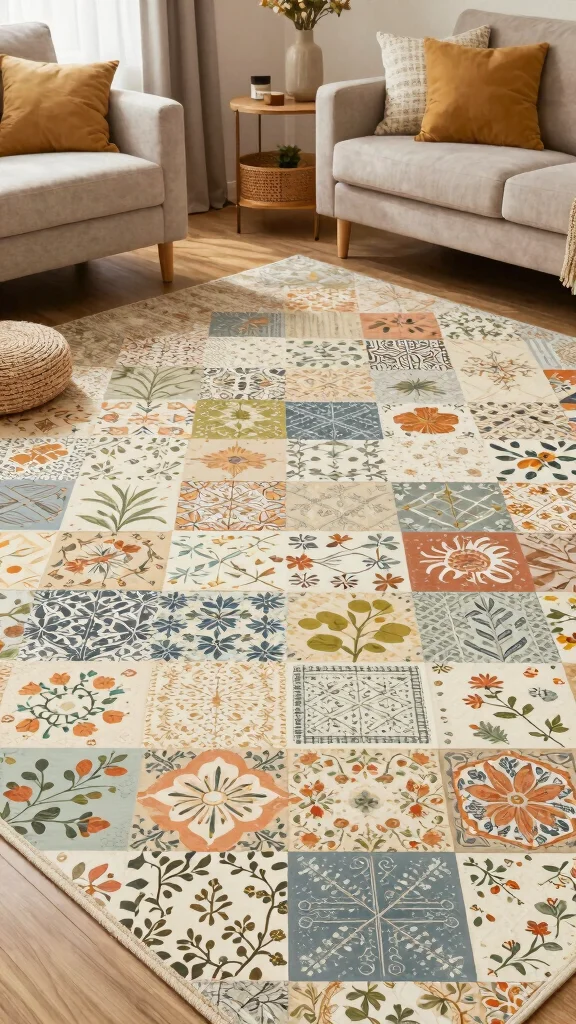
Patchwork stencils can create an eclectic and warm feel for your floors, reminiscent of cozy quilts. This design is fantastic for instilling a sense of warmth and homeliness, making it ideal for living rooms or play areas. Choose a mix of patterns and colors that reflect your personal style, from floral prints to geometric shapes, to make each patch a unique statement.
To enhance the patchwork effect, use contrasting colors to make each piece stand out, or keep it subtle with similar tones for a more cohesive look. This project is accessible and fun, connecting beautifully with current trends that celebrate individuality and creativity in home decor.
Consider these tips for your patchwork design:
– Ideal for living rooms or cozy spaces.
– Works well with informal decor styles for a charming vibe.
– Seal to maintain the vibrant look of the patches.
Embrace the charm of patchwork designs that tell a story and invite warmth into your home!
17. Stylish Ombre Effects
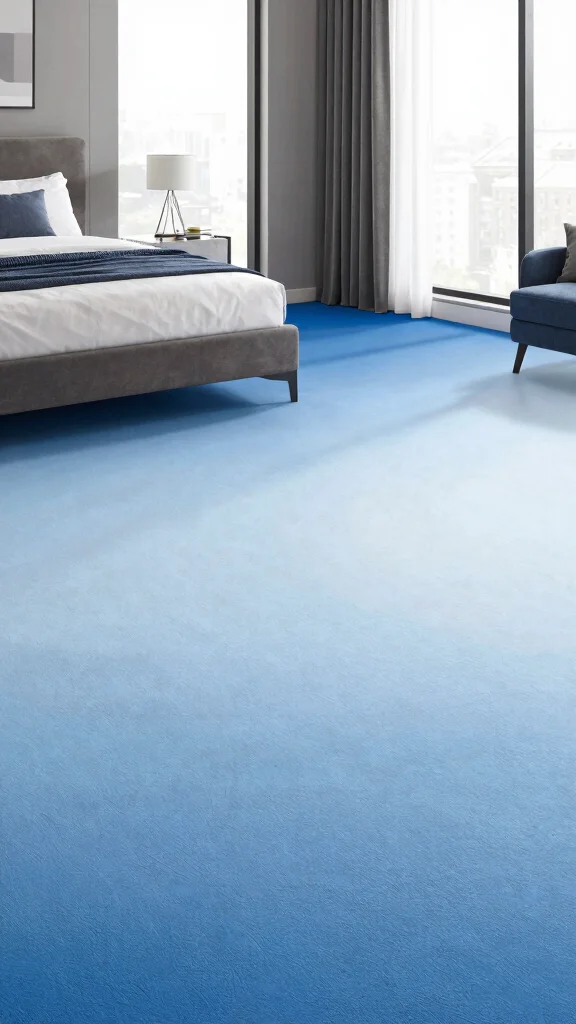
Ombre effects on floors create stunning visual transitions that can add depth and drama to your space. This technique works exceptionally well in minimalist or modern interiors, offering a unique flair that captivates attention. You can choose colors that blend seamlessly for a soft look or opt for bold, contrasting shades for a striking impact, making your floors a true focal point.
To achieve a perfect ombre finish, use a sponge to blend colors smoothly, ensuring a seamless transition. This project is accessible and can be tailored to fit any personal style, aligning beautifully with trends celebrating creativity and individuality in design. Sealing the surface will protect your work and enhance its longevity.
Explore these tips for your ombre project:
– Works well in living rooms or bedrooms for a dramatic effect.
– Combine with neutral decor to allow the ombre to shine.
– Seal for longevity and protection against wear.
Make your floors a work of art with beautiful ombre effects that inspire and captivate!
Fun fact: a subtle ombre on the stenciled floor can visually expand a small room by up to 15%. Use a sponge to blend colors smoothly for a seamless transition, and choose between soft neutrals or bold contrasts to keep it dramatic.
Conclusion
Stenciling your floors is an exciting and cost-effective way to revitalize your home. With countless designs and techniques at your fingertips, you can create a space that reflects your unique style.
From playful patterns to elegant motifs, there’s a stenciled floor idea for everyone. Why settle for ordinary when you can turn your floors into a work of art?
Get inspired, grab your stencils, and start your next DIY project today!
Frequently Asked Questions
What are the easiest stenciled floor ideas for a budget-friendly makeover?
Start with simple, repeatable patterns and affordable DIY floor stencils to transform a room without breaking the bank.
Pick a small, repeating motif and a clean, high-contrast color palette to keep costs down. Prepare the surface, use a quality primer, and apply multiple thin coats of paint with a stencil brush for crisp edges. Seal your work with a durable topcoat to protect the stenciled floor in high-traffic areas. This approach is a classic example of budget home decor turning a space into a stylish, creative flooring ideas option.
How should I choose stencil designs for small spaces to maximize impact?
For small spaces, opt for compact, repeating patterns rather than oversized motifs.
Choose designs that complement the room’s scale and furniture, and stick to a tight color palette to avoid visual clutter. Align borders with walls or doorways to create a sense of space, and use stenciling techniques like careful tapping and avoiding paint buildup for clean edges. These tips align with DIY floor stencils and creative flooring ideas for small rooms.
What supplies do I need to try DIY floor stencils on a budget?
Keep it simple and affordable with the essentials: DIY floor stencils, floor paint (or latex floor-safe paint), a primer, and a durable topcoat. Add a stencil brush or small roller, painter’s tape, drop cloths, and a sanding block for prep. Don’t forget a sealing product to protect your stenciled floor and long-lasting color. With these basics, you can achieve an affordable floor makeover that feels custom.
What maintenance steps help a stenciled floor stay looking fresh?
Seal and protect your work with a durable topcoat designed for floors, then clean with a mild, non-abrasive solution. Avoid harsh chemicals that can break down the paint, and wipe up spills promptly to prevent staining. Reapply a fresh coat or sealer every few years if you notice wear in high-traffic areas. Proper maintenance keeps your stenciled floor looking like new and preserves your budget home decor investment.
Are stenciled floors durable enough for high-traffic areas and how long will they last?
Yes, with proper prep and sealing, a stenciled floor can withstand regular use in many spaces. Start with a smooth, clean surface, use a compatible primer, and apply multiple sealed layers with a high-quality topcoat. For busy areas, choose durable paints and sealers and consider a lighter color that hides wear longer. When well cared for, a stenciled floor can serve as a creative flooring idea that remains affordable and stylish for years.
Related Topics
stenciled floor
budget home decor
DIY floor stencils
affordable makeovers
creative flooring
small spaces
easy stenciling
home improvement
beginner friendly
stylish updates
flooring techniques
trending decor
